Showing posts with label Holidays. Show all posts

Sunday, December 11, 2011

Browned Butter Blondie Brownies

I love love love sweets, but honestly don't bake very often because otherwise I would be the one to eat whatever I bake! So, anytime I have a good excuse to bake, I get excited about the possibilities and want to try to bake something extra special! I was recently invited to a Christmas cookie exchange, so it was the perfect opportunity to try something new!

I have always loved blondie brownies but wanted to do something a little something extra, so I decided to brown the butter. Browning butter results in a really delicious nutty flavor that I thought would work really well with the toffee and chocolate chips. The browned butter really does add a extra special flavor and is definitely worth the extra effort.

2 1/2 sticks unsalted butter
2 1/4 cups all-purpose flour
1 1/2 teaspoons baking powder
1 1/2 teaspoons salt
2 cups packed light-brown sugar
1/2 cup granulated sugar
3 large eggs
2 teaspoons pure vanilla extract
1 cup mini semi-sweet chocolate chips
1 cup toffee bits

Preheat oven to 350 degrees. In a saucepan over medium heat, cook the butter until it turns golden brown—about 15 minutes, but watch carefully and continue to stir with a wooden spoon. Remove from heat and allow to cool. In a large bowl, combine flour, baking powder and salt. In the bowl of an electric mixer, combine browned butter and both sugars. Stir with a wooden spoon until combined. Attach bowl to mixer and add eggs. Using the paddle attachment, beat on medium-high speed until light and fluffy--about three minutes. Add vanilla and beat to combine. Add flour mixture and mix well. Stir in chocoloate chips and toffee. Mix thoroughly and pour into greased 9 by 13 aluminum pan. Spread with spatula to even out. Bake 30-35 minutes (test with with a tootpick--it should come out clean!). Cool pan on a wire rack and cut into squares.

Sunday, November 13, 2011

Crawfish and Sausage Cornbread Dressing

Thanksgiving is coming up and I am getting so excited! I have been planning my menu for weeks. This year, my family will be coming to Louisiana from Texas for Thanksgiving!

Since we'll be having Thanksgiving in Cajun country, I thought I'd add a little Cajun flair to our Thanksgiving menu! While there are some Thanksgiving dishes that you just can't part with and have to make year after year,  the fun thing about stuffing/dressing is that you can really play around with the ingredients and create something totally different each year.

For this year's dressing, I decided to go with crawfish, sausage in a cornbread base. Here is what I came up with! I hope you like it and decide to add it your Thanksgiving menu.


Ingredients:
1 lb. andouille sausage of your choice, casings removed
1 lb. crawfish tails
1/2 cup green bell pepper, chopped
1/2 cup red bell pepper, chopped
1 cup yellow onion, chopped
1 cup celery, chopped
2 cloves of garlic, minced
1 small jalapeno, seeded and minced
3 boxes cornbread mix prepared, cubed and dried out or 1 14oz. bag of cornbread stuffing mix*
1 1/2-2 cups chicken stock
1 teaspoon Cajun seasoning

*If you decide to make your own cornbread, you'll want to do this ahead of time (at least a few hours) to give the cornbread time to dry out.

Make cornbread according to package directions. After cornbread has cooled, make cuts 1 inch apart vertically and horizontally across the pan. Begin to carefully break apart the cornbread. Allow to sit on the counter uncovered to dry out. Toss the cubes/crumbs every few hours to allow it to properly dry out. If you are short on time, pop the pan back in a low oven. Drying the cornbread out first will ensure that you have a light and airy stuffing.

Preheat oven to 350 degrees.

Remove sausage from casings. In a medium size pan over medium high heat, add sausage and cook until done. Add crawfish and cook for 3-5 more minutes. Transfer sausage and crawfish to a large mixing bowl. Add peppers, onion, celery, garlic and jalapeno to the pan. Saute until onions are translucent and peppers are soft. Transfer vegetables to the mixing bowl. Add cornbread crumbles, broth and cajun seasoning stirring to combine. Add additional stock if you want a wetter stuffing. Spoon stuffing into a greased 9 x 13 casserole dish. Bake uncovered for 45 minutes. Serve and enjoy!

Friday, December 31, 2010

Diet Dr. Pepper Glazed Ham

I don't typically make ham very often, but there is something about New Year's, ham, black-eyed peas and cornbread that just go so well together that totally justifies buying a huge ol' ham!

This year, I wanted to do a fun twist on the regular glazed ham and since my husband is a HUGE Diet Dr. Pepper fan, I thought I would make a diet Dr. Pepper glazed ham for him! Diet Dr. Pepper has a natural brown sugar flavor --or 23 flavors to be exact ;)-- so that I thought it would work really well as a glaze for the ham.

I hope you enjoy it and most of all, I hope you all have a wonderful New Year full of blessings!


Ingredients
6-8 lb. smoked, bone-in ham
1 12 oz. can of diet Dr. Pepper
2 tablespoons dijon mustard
1/2 cup packed light brown sugar
1 teaspoon cajun seasoning
1/8 teaspoon cayenne pepper

Preheat oven to 325 degrees. Remove ham from refrigerator. Next, you want to score the ham diagonally to create a diamond pattern. To do this, lay the ham, cut side down on a cutting board and with a sharp knife, lightly score the ham with diagonal lines one inch apart across the back of the ham. Turn the ham one counter clockwise quarter turn and score the ham with diagonal lines one inch apart. This should create a diamond pattern. Place ham in a shallow cooking dish (cut side facing out), set aside and allow it to come to room temperature. This is help the ham heat more evenly.

To make the glaze, combine remaining ingredients in a sauce pan over medium high heat. Bring to a light boil and reduce heat to low. Allow glaze to continue to simmer, whisking occassionally. Before the glaze thickens, lightly brush the ham with the glaze, cover the ham with foil and put in the oven to cook for about 3/4 of the total time (see below). The total cooking time will be about 15 minutes per pound, so for example, if your ham is six pounds, you will cook it a total of 90 minutes and you will want to cook it for one hour before reglazing.

Meanwhile, continue to simmer the glaze until reduced by 2/3, about 20-25 minutes. Remove from heat and allow to cool.

After one hour of cooking, remove ham from oven and discard foil. Liberally, glaze the ham with the thickened glaze and return to the oven to cook for the remainder of the time, reglazing every ten minutes.

Remove from oven and allow to rest for 20 minutes before serving. Serve with Hawaiian rolls or your favorite sandwich rolls along with your choice of dijon mustard, mayonaise or leftover Dr. Pepper glaze.

Enjoy!!

Cooking times:
6 lb. 90 mintues total (1 hour, 30 minutes)
7 lb. 105 minutes total (1 hour, 45 minutes)
8 lb. 120 minutes total (two hours)

Wednesday, December 29, 2010

New Year's Black-Eyed Peas

It's not New Year's Day without at least a spoonful of Black Eyed Peas, is it? You know they are supposed to bring you good luck, how could you not have at least a spoonful?...Wink!
So, with the new year approaching, whip up a batch for your family... This recipe is so easy and delicious, you're all sure to have a lucky 2011!
Ingredients:
1 cup thick-cut bacon, chopped
1/2 medium yellow onion, chopped
2 cloves garlic, minced
1 medium jalepeno, chopped (with or without seeds, your call)
4 cups water (plus 1 cup later, if needed)
1 12 oz. package of pre-soaked black-eyed peas
1 teaspoon salt
1/2 teaspoon pepper
1/8 teaspoon ground cumin
2-3 dashes of Tabasco

In a stockpot over medium heat, cook the bacon until browned and crisp. Depending on the size of your pot, you might want to do in two batches so as not to overcrowd the pot. Remove bacon to a plate and drain excess grease from the pot, but leave any browned bits in the pot. Add the onions, jalepeno and garlic to the pot and saute for two minutes. Add the water, peas, salt, pepper, cumin and tabasco and bring to a simmer. Simmer uncovered on low for approximately two hours, stirring occasionaly.

After the first hour, check the water level to see if it looks dry. If needed, add about one additional cup of water. Also, check the broth for flavor and adjust seasonings, if needed.

After the second hour, taste the black-eyed peas for tenderness. Remove from heat or continue cooking depending on how you like your black-eyes peas. Personally, I like them with a little broth and not too mushy, but you can certainly cook them longer if you prefer. Serve with corn bread.

I hope everyone has a wonderful new year full of blessings!

Happy New Year!

Enjoy!

Friday, December 17, 2010

Smoked Gouda en Croute

If you loved my recipe for Baked Brie en Croute, you will love this recipe for Baked Smoked Gouda en Croute just as much! It is equally simple (if not more) and equally delicious! Perfect for those holiday parties and get togethers!


Ingredients:
1 sheet puff pastry, thawed
1 7 ounce round of smoked gouda, wax removed
1 tablespoon dijon mustard
1 egg

Preheat oven to 375 degrees.
Dust your countertop with the flour and carefully unfold the puff pastry. With a rolling pin, roll the puff pastry out to expand the size a bit. Spoon the mustard into the center of the pastry and using a pastry brush, a knife or the back of a spoon, evenly spread the mustard over the pastry. Place the gouda in the center of the pastry. Carefully fold up the sides of the pastry around the gouda, crimping the sides together and tucking the folds under. If you can, trim off any excess pastry. Flip the gouda and place on a greased pan seam side down. If you have any excess pastry, use it to decorate the top. Use your favorite cookie cutters to achieve the desired shapes.  In a small bowl, beat the egg and add about a teaspoon of water. Brush the pastry with the egg wash.

Bake for about 20-25 minutes or until the pastry is a nice golden brown color.

Allow to sit for about 10-15 minutes before cutting into the pastry to allow the cheese to set a bit. Serve with an assortment of crackers.

Enjoy!

Sunday, November 21, 2010

Thanksgiving Menu

Planning your Thanksgiving Day menu? Need some ideas? 

Here's what will be on my table this Thanksgiving:

 Turkey Gravy
Rolls

I hope you have a wonderful Thanksgiving!

Baked Brie en Croute (with cranberries and pecans)

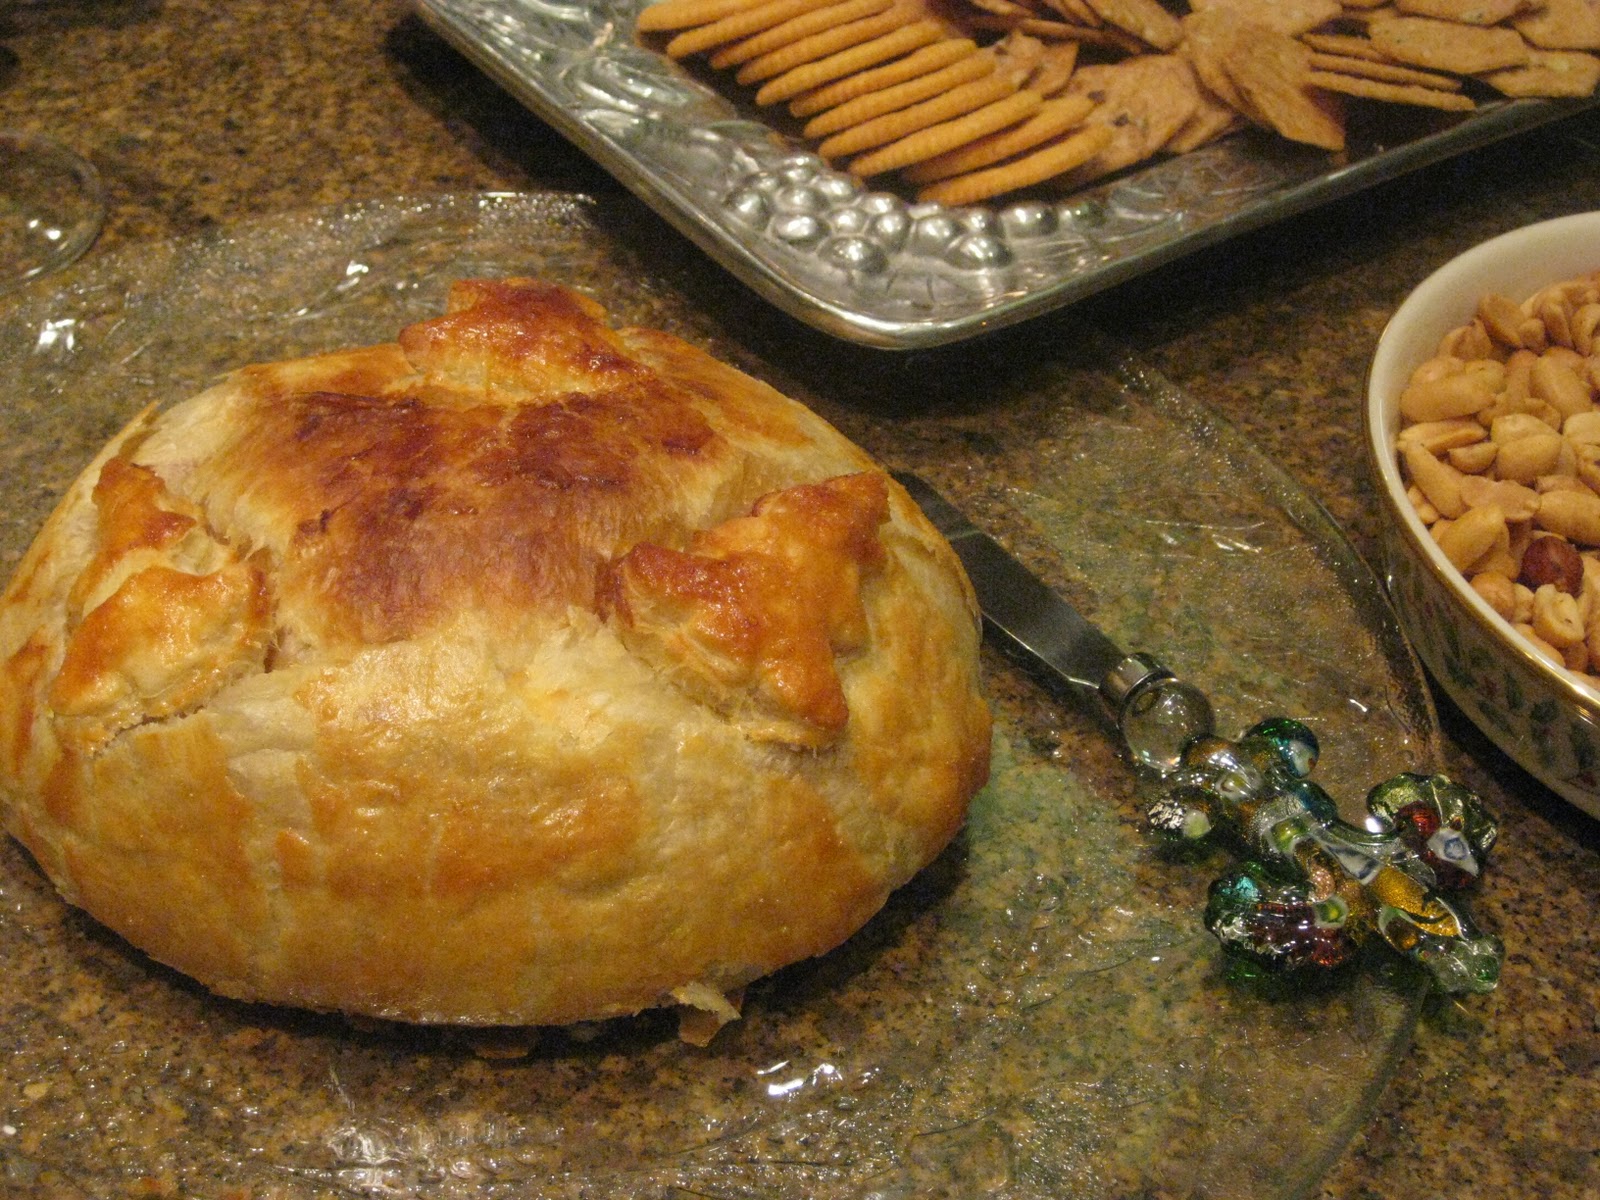
In need of an easy yet elegant appetizer? Look no further! This recipe can be prepared in less than ten minutes and will look great when it comes out of the oven--and will taste even better! I recently made this for a dinner party and it seemed to be a big hit because it was gone fairly quickly!


The creamy brie goes really nicely with the tang of the cranberries and the crunch of the pecans while the buttery, flaky pastry holds it all together and imparts a decadence in both taste and appearance.

Ingredients:
1 wheel of brie cheese
1/4 cup pecan halves, chopped
3 tablespoons cranberry preserves
2 tablespoons dried cranberries (Craisins), roughly chopped
1 tablespoons flour
1 sheet puff pastry, thawed
1 egg, beaten

Preheat oven to 375 degrees. Remove brie from packaging and carefully cut the rind off using a serrated knife. Hold your knife parallel to the counter and carefully shave the brie off the top and bottom. Turn the brie up on its side to cut the rind off the sides. Don't worry if you don't get it all off, you just want to lightly remove the rind but not too much that the cheese will lose the shape.

In a small pan over low heat, toast pecans for several minutes, until warm. Toasting nuts releases the oil in the nuts and intensifies the flavor. Remove pecans from pan and roughly chop. Add the pecans, preserves and cranberries to a small bowl and mix until well combined.

Dust your countertop with the flour and carefully unfold the puff pastry. With a rolling pin, roll the puff pastry out to expand the size a bit. Spoon the pecan mixture onto the center of the puff pastry. Place the brie directly on top of the pecan mixture. Carefully fold up the sides of the pastry around the brie, crimping the sides together and tucking the folds under. If you can, trim off any excess pastry. Flip the brie and place on a pan seam side down. If you have any excess pastry, use it to decorate the top. I attempted to make some leaves for mine and they didn't turn out so hot, so I hope you have a bit more talent than I-which shouldn't be hard...I am not much of an artist! In a small bowl, beat the egg and add about a teaspoon of water. Brush the pastry with the egg wash.

Bake for about 20-25 minutes or until the pastry is a nice golden brown color.

Allow to sit for about 10-15 minutes before cutting into the pastry to allow the cheese to set a bit. Serve with an assortment of crackers.

Enjoy!

Tuesday, November 16, 2010

Mashed New Potatoes

Who doesn't love mashed potatoes? Well, I don't really know anyone! I personally, love  potatoes--there are so many things that you can do with potatoes and mashing them up with different ingredients is both super easy and super delicious. In this version, I use red new potatoes with the skin on and mash them up with a bit of cream cheese. This is just one of the my favorite ways to do mashed potatoes. The creamy consistency of the potatoes goes really well with the cream cheese and the skin gives a the potatoes a nice texture.

Ingredients
2 lb. red new potatoes, scrubbed well and quartered
1/3 cup milk
4 oz. cream cheese, softened and cubed
1 teaspoon salt
1/2 teaspoon garlic powder
1/4 teaspoon ground black pepper

Fill a large stock pot with water, place potatoes in pot and bring water to a boil. Cook potatoes until they pierce easily with a fork. Drain potatoes and then transfer to a large mixing bowl. Using a hand mixer, slightly mash the potatoes with the beaters (don't turn it on yet). Add cream cheese, salt, garlic powder and pepper and then beat potatoes on low until slightly smooth. Slowly add milk and continue to beat until you reach your desired consistency, but don't over beat as the potatoes can get gummy.

Enjoy!

Sunday, November 7, 2010

Mushroom, Sausage and Sage Stuffing

Thanksgiving is approaching so it's about time to start planning your Thanksgiving menu! I am a major planner, so I have of course been thinking about mine and preparing accordingly. I have cooked my fair share of Thanksgiving dinners; however, I have to be honest...I am not a fan of stuffing and usually let someone else make it! I have a major aversion to anything soggy, so you can see why I don't really care too much for stuffing. But, I am having a Thanksgiving dinner party soon and Thanksgiving Day is fast approaching, so I wanted to come up with a stuffing recipe worthy of sharing with you!

I planned to test out my ideas for dinner knowing that my husband would be happy to eat my share of the stuffing, but I liked the stuffing so much I kept my share to myself! I have to admit, I was surprised at how much I liked it! The sausage gives the stuffing a great flavor and texture and since I cooked it uncovered, the top was crunchy and the inside was not soggy at all! Who would have thought--I like stuffing!


Ingredients
1 lb. breakfast sausage
1 yellow onion, chopped
1 cup celery, chopped
12 oz. sliced mushrooms, roughly chopped
8 fresh sage leaves, chopped
1 tablespoon worchestershire sauce
14 oz. dry stuffing
2 cups chicken broth

Preheat oven to 350 degrees. Crumble sausage into a large skillet over medium heat and cooked until browned. Remove sausage from pan and drain on paper towel. Add onion, celery and mushrooms to pan and saute until onions and celery are opaque and mushrooms are cooked through and browned. Add sage and worchestershire and stir to combine. Add sausage back to pan. Add stuffing mix and broth and stir to combine all ingredients.  Spoon stuffing mixture into a greased 9x13 baking dish and bake uncovered for 35 minutes.

Enjoy! I hope this recipe graces your Thanksgiving table this year!

Thursday, October 28, 2010

Festive Pumpkin Bundt Cake with Cinnamon Cream Cheese Icing

I normally consider myself more of a cook than a baker and I usually don't dabble too much in creative cutesy food, but for some reason, I really wanted to make something cute for fall and this is what I came up with! Perfect for Halloween parties, Thanksgiving or just for fun! Cute and delicious--can't beat that!


Cake
1 butter yellow cake mix
1 package sugar free instant butterscotch pudding mix
4 eggs
1/4 vegetable oil
1/4 water
1 15 oz. can of pumpkin
1 1/2 teaspoons pumpkin pie spice
1/2 teaspoon ground cinnamon

Preheat oven to 350 degrees. Combine all ingredients in a large mixing bowl. Starting on a low (so you don't splatter yourself and your kitchen), mix ingredients until slightly incorporated before turning the mixer to medium high. Continue to beat the batter for three to five minutes. This will "activate" the instant pudding mix and also whip air into your batter leaving you with a moist and airy cake. Pour batter into a well greased fluted bundt pan. Bake for approximately 55 minutes. Remove cake from oven and test with a knife or tooth pick to ensure the cake is finished. Cool in the pan for approximately 20 minutes and then remove from pan and cool on a cooling rack.

Icing
4 oz. cream cheese, softened (1/2 block)
2 tablespoons butter or margarine, softened
2 cups of powdered sugar
1/2 teaspoon vanilla
1/8 teaspoon cinnamon
1 tablespoon milk
Yellow and Red gel food coloring

While cake is cooling, in a large bowl, combine cream cheese, butter and powdered sugar until smooth. Again, start on low and work your way up to medium on the speed! Stir in vanilla and cinnamon. Add milk a little at a time until you get a consistency that will allow you to drizzle the icing over the cake and let it drip down the sides.

Leaves
1/2 roll marzipan (almond paste found in the baking aisle)
Green gel food coloring
Toothpicks for assembly

Unwrap the marzipan and gauge the pliability. It should be soft and moldable, but if it is like mine, it will be hard as a rock! So, what you'll want to do is heat it for about 30 seconds to get it a little softer. After it is soft enought to mold, knead the marzipan to get it so a smoother consistency and then add the food coloring to get the desired color of green you are looking for. Break off about 3/4 of the marzipan and begin to mold the stem. Next, proceed with molding the remaining marzipan into leaves. At any point during the molding process, you might need to pop the marzipan back in the microwave for 10-15 seconds to soften it back up. Set Leaves aside until you are ready to assemble.

After the cake has cooled completely, invert the cake onto a serving platter and slowly spoon the icing over the top of the cake, allowing the icing to drip down the side. Attach the stem with a toothpick by heating the stem in the microwave for 10-15 seconds. Push a tooth pick through one side of the bottom of the stem and out the other side. Using another toothpick, create a cross with the toothpicks by pushing the second through the other side. Secure the stem into the cake using the toothpicks. Place the leaves on the cake, resting them against the stem and the toothpicks.

Refrigerate until serving.


Serve and enjoy! Happy Fall!

Wednesday, May 5, 2010

Holy Moly Guacamole it's Cinco de Mayo!

In my last post, I mentioned my love for guacamole and my new love for avocados in general. Not being a fan of queso (surprise, surprise) I have always loved guacamole and it is of course my favorite thing about Mexican food (and margaritas). My brother in law, Brian, shares my loves for guacamole and I can always count on him to want to order it in addition to queso, so that I am not the only one who wants it!

Back in the day, I actually worked as a waitress at a Mexican restaurant. Funny to imagine that I actually carried those big trays around (I totally sucked at that, by the way) but I did. It was not your run of the mill Mexican restaurant and was actually pretty nice and one of the things that the restaurant offered was Table-Side Guacamole. So, needless to say, I got pretty darn good at whipping up tasty guacamole.

There are a few things that I make/cook that my family members look forward to and my guacamole is one of them. So, I hope you enjoy it just as much!

Ingredients:
3 ripe avocados, halved and seeded
2-3 tablespoons finely chopped yellow onion
2 tablespoons of salsa of your choice (I personally like Pace!)
Juice of 1 lemon
1-2 tablespoons cilantro, finely chopped
1/2 teaspoon of salt
1/2 teaspoon of garlic powder
1/8 teaspoon of cumin
Pinch of cayenne pepper or a few dashes of Tabasco

After halving the avocados and removing the pit, use your knife to make vertical cuts across the avocado being careful not to puncture the skin or cut your hand! Then rotate the avocado and make vertical cuts across the other side making a checkboard-type pattern. Repeat with all the halves and then carefully scoop out the flesh of the avocado into a bowl with a spoon by running the spoon around the edge of the skin. Combine the remaining ingredients and mash the avocado with either a potato masher or two forks to achieve the texture and consistentcy you desire.

Make sure to taste the guacomole and adjust the seasoning as necessary. I find that most often the salt or the lemon need to be adjusted, so add more according to your taste. Give it one last stir and taste and then serve with your favorite tortilla chips or as a topping for fajitas, tacos or your other favorite Mexican foods.

Tip: If you are not going to be serving right away, reserve one or two of the avocado pits and place them in the guacamole. This will help slow down the browning process. You may do this with leftovers as well, but I would recommend placing plastic wrap directly on top of the guamacole to prevent the air from getting to it and then putting one more piece of plastic wrap over the bowl.

Enjoy and Happy Cinco de Mayo!

Thursday, November 19, 2009

Pumpkin Gooey Butter Cakes

Since I don't bake all that often and don't really experiment with desserts (there is science to baking that you don't really want to mess with...) I turned to an expert to find a a delicious and decadent dessert for Thanksgiving. Who better to go to than the wonderful Paula Deen?! This dessert by Paula Deen is soo delicious and it is sure to become a family favorite just as it has in our family.

Cake:
1 (18 1/4-ounce) package yellow cake mix
1 egg
8 tablespoons butter, melted

Filling:
1 (8-ounce) package cream cheese, softened
1 (15-ounce) can pumpkin
3 eggs
1 teaspoon vanilla
8 tablespoons butter, melted
1 (16-ounce) box powdered sugar
1 teaspoon cinnamon
1 teaspoon nutmeg

Preheat oven to 350 degrees F.

Combine the cake mix, egg, and butter and mix well with an electric mixer. Pat the mixture into the bottom of a lightly greased 13 by 9-inch baking pan.

To make the filling: In a large bowl, beat the cream cheese and pumpkin until smooth. Add the eggs, vanilla, and butter, and beat together. Next, add the powdered sugar, cinnamon, nutmeg, and mix well. Spread pumpkin mixture over cake batter and bake for 40 to 50 minutes. Make sure not to overbake as the center should be a little gooey.

Enjoy!

Monday, November 9, 2009

Brined and Roasted Turkey (Thanksgiving)

Can you believe that it is almost Thanksgiving? This year has just flown by! (It is actually just a few days away from our first wedding anniversary and I can not believe the first year has gone by so quickly! Great memories already! Happy Anniversary Steven!)

Anyways, back to Thanksgiving!

I am such a holiday-loving girl and of course Thanksgiving is no exception! There is so much cooking to be done, time spent with family and of course, eating! What's not to love! For me, my favorite part of the holiday is the Wednesday before Thanksgiving which I aptly nicknamed "Cooking Day." This is the day when my mom and sisters and I get together and start cooking for Thanksgiving. Translation: My mom and I do a lot of cooking, Annie tries to cook and we all laugh at her and Katherine does a dessert or two and sits at the counter and reads gossip magazines out loud. It is truly one of my favorite days.

Because Thanksgiving is largely built around traditions (at least in our family) and there is a lot of pressure to please and impress, it is a time of the year that I don't really mess around with trying a whole lot of new things in the kitchen. I stick with the favorites.

Since the turkey is the star of the show, it has to be good, so my mom and I do the same turkey every year (and actually for the last couple of years, I did it all by myself!).

If you are looking for a new recipe, this is one to try! You will not be disappointed. The turkey comes out juicy and delicious!


Brine:
1 cup salt
1 cup brown sugar
2 oranges, quartered
2 lemons, quartered
6 sprigs thyme
4 sprigs rosemary
Dissolve the salt and sugar in 2 gallons of cold water in a non-reactive container (such as a clean bucket or large stockpot, or a clean, heavy-duty, plastic garbage bag.) Squeeze the oranges and lemons and add them, along with the thyme and rosemary, to the brine.

Turkey:
1 (10 to 12-pound) turkey
Brine, recipe follows
4 tablespoons unsalted butter at room temperature
1 large yellow onion, cut into 8ths
1 large orange, cut into 8ths
1 stalk celery, cut into 1-inch pieces
1 large carrot, cut into 1-inch pieces
2 bay leaves
2 sprigs thyme
1 1/2 to 2 cups chicken or turkey stock, for basting

Remove the neck, giblets, and liver from the cavity of the turkey. Rinse the turkey inside and out under cold running water.

Soak the turkey in the brine, covered and refrigerated (or in a cooler), for at least 4 hours and up to 24 hours. Turn the turkey at least once during the process.

Preheat the oven to 325 degrees F.

Remove the turkey from the brine and rinse well under cold running water. Pat dry with paper towels, inside and out. Place breast side down in a large, heavy roasting pan and rub on all sides with the butter. Season lightly inside and out with salt and pepper. Stuff the turkey with the onion, orange, celery, carrot, bay leaves and thyme. Truss the turkey with kitchen twine.

Roast the turkey, uncovered, breast side down for 1 hour. Remove from the oven, turn, and baste with 1/2 cup stock. Continue roasting with the breast side up until an instant-read meat thermometer registers 165 degrees F when inserted into the largest section of thigh (avoiding the bone), about 2 3/4 to 3 hours total cooking time. Baste the turkey once every hour with 1/2 to 3/4 cup chicken or turkey stock.

Remove from the oven and place on a platter. Tent with aluminum foil and let rest for 20 minutes before carving.

I will post some more Thanksgiving favorites as it gets closer. If you have a family tradition or recipe that you would like to share, let me know! I'd love to post it for you!
Related Posts with Thumbnails