Saturday, September 10, 2011

Hatch Green Chile Sauce

By nature, I am a planner. I plan out everything. I plan what I need to do and when, what I want to wear and, of course, what I am going to cook.  I don't like to have to go to the store multiple times so I usually plan out the whole week and make a list of everything I need before going to the store.

However, there are rare spontaneous moments when I either can't think of anything to make or just happen to go to the store on my way home, I'll just walk through the produce, seafood, and meat departments to see what looks good, is on sale, in season, etc. This is how I came up with this recipe.

Hatch green chiles come from Hatch, New Mexico and are in season this time of year--late August, early September. My dad grew up in New Mexico and loves New Mexican cuisine, so when I saw the Hatch chiles in the store, I got them in hopes of coming up with something delicious for us, for him and for you!


This sauce can be used in so many ways. I poured it over grilled chicken, mixed it in with scrambled eggs for Steve and even chilled it and ate it with tortilla chips.  Let me know how you use it!


Ingredients:
3 hatch green chiles
2 jalepenos
2 T olive oil, divided
1 T flour
3/4 cup chicken stock
1/8 t ground cumin
1/8 t cayenne pepper
salt & pepper, to taste

First you need to roast the chiles and jalepenos. Green chiles can have a bitter taste in the skin, so roasting the peppers first will get rid of that taste because you'll remove the skin. To roast, you can either hold the peppers over your gas stove, throw on the grill or broil in your oven. You'll want to roast the peppers until the skin blisters and chars. If roasting in the oven, preheat oven to 400 degrees. On a foil lined sheet pan, drizzle peppers with one tablespoon of olive oil and sprinkle with salt. Roast for twenty minutes, flip chiles and jalepenos and roast for an additional 20 minutes. Place the charred chiles in a brown paper bag and allow to sit for 10 to 15 minutes. This will allow them to steam and will make the skin come off easier. Cut off stem, slice lengthwise and gently peel the skin off and remove seeds. Chop into small pieces.

In a pan over medium, heat olive oil. Add onion and garlic to the pan and sauté for one minute. Add green chiles and jalepenos and sauté another two minutes. Add flour and stir to distribute. Cook out raw flour taste for about one minute. Add chicken stock to the pan, scraping up and browned bits from the bottom. Stir until smooth. Add cumin, chili powder, salt and pepper.  Bring to a low boil, stirring occasionally. When it comes to a boil, reduce to a low simmer. Continue to simmer for about 20 minutes.

If you'd like a smoother texture, blend with an immersion blender until you get your desired consistency . If  you don't have an immersion blender, cool sauce and pour in your blender and blend until you get your desired consistency. Make sure to cool the sauce or you might blow the top off your blender and have a giant mess! :)

I hope you enjoy this sauce! Let me know what you think! If you like it, I'd suggest making a big batch and freeze it for when the chiles are out of season.

Tuesday, February 1, 2011

Spice Rubbed Steak Taquitos

I have had a few people mention that they are big fans of my Chipotle Chicken and Cilantro and Lime Chicken taquito recipes, so I asked my resident taquito connoisseur and asked if he had any preferences for a new taquito recipe. He said, "Steak, please." and the result is what you'll find below! A taquito made with flavorful, juicy steak--seasoned to perfection with my homemade spice rub--a little onion, a little heat and some jack cheese. Oila!

I hope you love my homemade taquito recipes as much as my hungry husband! They are definitely a healthier, more flavorful alternative to the frozen variety and are sure to impress!


Spice Rub:
1 teaspoons salt
1/2 teaspoon black pepper
1 teaspoon garlic powder
1 teaspoon dried minced onion
1 teaspoon cumin
1 teaspoon chili powder
1 teaspoon coriander powder
1 teaspoon paprika
1/4 teaspoon cayenne pepper

Ingredients:
1 lb. flank steak
1 teaspoon olive oil
1 poblano, finely chopped
1 quarter of a yellow onion, finely chopped
1 jalepeno pepper, seeded (if desired) and minced
4 oz. jack cheese, shredded
Tortillas
Small skewers

Remove steak from refrigerator and allow to come to room temperature. Preheat grill to high heat.

Season steak liberally on both sides with spice rub, rubbing the mixture into the meat. Grill on medium high heat for approximately eight minutes on each side or until desired doneness. Set aside to rest and cool.

Meanwhile, preheat oven to 450 degrees. In a skillet over medium heat, saute the poblano, onion and jalepeno in the olive oil for 2-3 minutes, or until onions are translucent. Remove from heat, allow to cool.

When steak has cooled, cut into thin strips. Make sure to cut perpendicular to the direction the grain runs.

To assemble, cut each tortilla in half. Starting with one tortilla half, place two to three strips of steak on in the tortilla, spoon about one tablespoon of onion mixture into the tortilla. Top with a pinch of cheese, roll tortilla up, wrapping as tightly as possible, secure with a toothpick and place on a baking sheet. Repeat with remaining tortillas or until you run out of steak and onion mixture. Top each taquito with a bit of cheese, if you still have extra cheese leftover. Bake for 7-9 minutes and then broil for one minute.

Enjoy!!

Tuesday, January 4, 2011

Feta Stuffed Crispy Pesto Chicken

I don't know about you, but I love pesto! It has a great color and flavor and it smells great when you cook with it. If you love pesto too, then you will love this easy and delicious recipe that is perfect for weeknight dinners!

The chicken will come out juicy and flavorful with just the right amount of crunch. And it looks pretty too!


Ingredients
4 chicken breasts, boneless, skinless
4 tablespoons feta, crumbled
8 tablespoons store bought pesto
1 cup parmesan cheese, grated
1 cup panko bread crumbs (Japanese style bread crumbs)

Preheat oven to 350 degrees. Trim excess fat from chicken, if needed. In order to stuff the chicken, you will need to create a pocket. To do so, hold your knife parallel to the counter and carefully slice through the middle of the chicken pulling the top back as you slice until it lays almost flat but is still in tact. Repeat with all chicken breasts. Using two tablespoons of pesto per chicken breast, spread one tablespoon on the inside of the pocket and one tablespoon on the entire outside of the chicken. Repeat with remaining chicken. Stuff each chicken breast with one tablespoon of feta crumbles. Secure each chicken breast with a toothpick or small skewer.

In a shallow dish, mix together the panko and parmesan. Throughly coat each chicken breast on both sides with the panko/parmesan mixture, pressing the mixture into the chicken. Place chicken breasts in a greased baking dish or sheet tray. Bake for 30 minutes and then broil on high for one to two minutes until golden brown.

Enjoy!

Friday, December 31, 2010

Diet Dr. Pepper Glazed Ham

I don't typically make ham very often, but there is something about New Year's, ham, black-eyed peas and cornbread that just go so well together that totally justifies buying a huge ol' ham!

This year, I wanted to do a fun twist on the regular glazed ham and since my husband is a HUGE Diet Dr. Pepper fan, I thought I would make a diet Dr. Pepper glazed ham for him! Diet Dr. Pepper has a natural brown sugar flavor --or 23 flavors to be exact ;)-- so that I thought it would work really well as a glaze for the ham.

I hope you enjoy it and most of all, I hope you all have a wonderful New Year full of blessings!


Ingredients
6-8 lb. smoked, bone-in ham
1 12 oz. can of diet Dr. Pepper
2 tablespoons dijon mustard
1/2 cup packed light brown sugar
1 teaspoon cajun seasoning
1/8 teaspoon cayenne pepper

Preheat oven to 325 degrees. Remove ham from refrigerator. Next, you want to score the ham diagonally to create a diamond pattern. To do this, lay the ham, cut side down on a cutting board and with a sharp knife, lightly score the ham with diagonal lines one inch apart across the back of the ham. Turn the ham one counter clockwise quarter turn and score the ham with diagonal lines one inch apart. This should create a diamond pattern. Place ham in a shallow cooking dish (cut side facing out), set aside and allow it to come to room temperature. This is help the ham heat more evenly.

To make the glaze, combine remaining ingredients in a sauce pan over medium high heat. Bring to a light boil and reduce heat to low. Allow glaze to continue to simmer, whisking occassionally. Before the glaze thickens, lightly brush the ham with the glaze, cover the ham with foil and put in the oven to cook for about 3/4 of the total time (see below). The total cooking time will be about 15 minutes per pound, so for example, if your ham is six pounds, you will cook it a total of 90 minutes and you will want to cook it for one hour before reglazing.

Meanwhile, continue to simmer the glaze until reduced by 2/3, about 20-25 minutes. Remove from heat and allow to cool.

After one hour of cooking, remove ham from oven and discard foil. Liberally, glaze the ham with the thickened glaze and return to the oven to cook for the remainder of the time, reglazing every ten minutes.

Remove from oven and allow to rest for 20 minutes before serving. Serve with Hawaiian rolls or your favorite sandwich rolls along with your choice of dijon mustard, mayonaise or leftover Dr. Pepper glaze.

Enjoy!!

Cooking times:
6 lb. 90 mintues total (1 hour, 30 minutes)
7 lb. 105 minutes total (1 hour, 45 minutes)
8 lb. 120 minutes total (two hours)

Wednesday, December 29, 2010

New Year's Black-Eyed Peas

It's not New Year's Day without at least a spoonful of Black Eyed Peas, is it? You know they are supposed to bring you good luck, how could you not have at least a spoonful?...Wink!
So, with the new year approaching, whip up a batch for your family... This recipe is so easy and delicious, you're all sure to have a lucky 2011!
Ingredients:
1 cup thick-cut bacon, chopped
1/2 medium yellow onion, chopped
2 cloves garlic, minced
1 medium jalepeno, chopped (with or without seeds, your call)
4 cups water (plus 1 cup later, if needed)
1 12 oz. package of pre-soaked black-eyed peas
1 teaspoon salt
1/2 teaspoon pepper
1/8 teaspoon ground cumin
2-3 dashes of Tabasco

In a stockpot over medium heat, cook the bacon until browned and crisp. Depending on the size of your pot, you might want to do in two batches so as not to overcrowd the pot. Remove bacon to a plate and drain excess grease from the pot, but leave any browned bits in the pot. Add the onions, jalepeno and garlic to the pot and saute for two minutes. Add the water, peas, salt, pepper, cumin and tabasco and bring to a simmer. Simmer uncovered on low for approximately two hours, stirring occasionaly.

After the first hour, check the water level to see if it looks dry. If needed, add about one additional cup of water. Also, check the broth for flavor and adjust seasonings, if needed.

After the second hour, taste the black-eyed peas for tenderness. Remove from heat or continue cooking depending on how you like your black-eyes peas. Personally, I like them with a little broth and not too mushy, but you can certainly cook them longer if you prefer. Serve with corn bread.

I hope everyone has a wonderful new year full of blessings!

Happy New Year!

Enjoy!

Friday, December 17, 2010

Smoked Gouda en Croute

If you loved my recipe for Baked Brie en Croute, you will love this recipe for Baked Smoked Gouda en Croute just as much! It is equally simple (if not more) and equally delicious! Perfect for those holiday parties and get togethers!


Ingredients:
1 sheet puff pastry, thawed
1 7 ounce round of smoked gouda, wax removed
1 tablespoon dijon mustard
1 egg

Preheat oven to 375 degrees.
Dust your countertop with the flour and carefully unfold the puff pastry. With a rolling pin, roll the puff pastry out to expand the size a bit. Spoon the mustard into the center of the pastry and using a pastry brush, a knife or the back of a spoon, evenly spread the mustard over the pastry. Place the gouda in the center of the pastry. Carefully fold up the sides of the pastry around the gouda, crimping the sides together and tucking the folds under. If you can, trim off any excess pastry. Flip the gouda and place on a greased pan seam side down. If you have any excess pastry, use it to decorate the top. Use your favorite cookie cutters to achieve the desired shapes.  In a small bowl, beat the egg and add about a teaspoon of water. Brush the pastry with the egg wash.

Bake for about 20-25 minutes or until the pastry is a nice golden brown color.

Allow to sit for about 10-15 minutes before cutting into the pastry to allow the cheese to set a bit. Serve with an assortment of crackers.

Enjoy!

Monday, November 29, 2010

Southwestern Turkey Chili

Still have leftover turkey hanging around? Try this super easy recipe for turkey chili. It is perfect for the cold weather and you can make it in a snap!


You can also substitute chicken for the turkey if you want to make this any other time of year when you don't necessarily have leftover turkey!

Ingredients
1 tablespoon olive oil
1 cup yellow onion, chopped
1 cup green bell pepper, chopped
1 lb. leftover turkey, shredded
1 14.5 oz. can of petite diced tomatoes
1 10 oz. can of Rotel
1 15 oz. can of pinto beans, drained and rinsed
1 15 oz. can of black beans, drained and rinsed
1 cup frozen yellow corn
1 teaspoon dried onion
1 tablespoon garlic powder
1 tablespoon ground cumin
1 tablespoon chili powder
1/2 teaspoon cayenne pepper
4 cups water

Optional toppings:
Shredded cheese
Sour Cream
Fresh Cilantro, chopped
Tortilla Chips

Heat olive oil in a skillet over medium high heat. Saute onion and bell pepper for 3-4 minutes. Transfer to a slow cook and add all remaining ingredients, stirring to combine. Turn slowcooker to high and cook on high for 4 hours or low for 8 hours. Serve with desired toppings and tortilla chips or corn bread.

Friday, November 26, 2010

Turkey and Dumpling Soup

True or False: It's the day after Thanksgiving and your fridge is loaded down with leftovers from the day before. I'm going to go with True.

While you definitely can't go wrong with just heating up a little turkey, mashed potatoes and drizzling on a little gravy, here is a great recipe if you want something a little different or have more turkey than you know what to do with! Plus this the perfect thing to make on a cold rainy day like today! )Well, at least here in Louisiana--even though it was 80 degrees yesterday!)


Ingredients
1 tablespoon oil or butter
3/4 cup chopped yellow onion (1 small onion-baseball size)
3/4 cup chopped celery
3/4 cup chopped carrot
1 tablespoon flour
8 cups turkey stock, see below for recipe or purchase at the store
2 cups water
1 lb. leftover turkey (more or less, depending on your leftovers)
1 bay leaf
1/2 teaspoon dried rosemary

In a large stockpot, heat oil or butter over medium heat. Saute onion, celery and carrot 3-5 minutes. Sprinkly veggies with flour and cook for one to two minutes. Pour about one cup of stock into the pot, scraping up the brown bits on the bottom and stirring to incorporate. Turn heat to high and bring to a boil. Pour in remaining stock and water. Add turkey and stir in bay leaf and rosemary. Reduce heat and simmer for one hour. Taste soup and season with salt and pepper, as desired.

Dumplings
1 1/2 cup Bisquick
1/3 cup milk
Pinch of salt
1/2 teaspoon dried rosemary, chopped or crumbled in your hand

In a small bowl, combine all ingredients until you get a slightly sticky dough. Bring broth mixture to a boil and spoon about a teaspoon at a time of dumpling dough into the boiling liquid. Cook uncovered for about 10 minutes and then cover and cook for another 10 minutes.

Serve with leftover rolls and whatever else you have! And if you have leftover soup, save it for the next day--it'll be even better!

Turkey Stock
Turkey Carcass,  meat removed and broken down to fit into the pot
16 cups of water
2 celery ribs, cut into two inch pieces
2 large carrots, peeled and cut into two inch pieces
2 onion, quartered
3 sprigs fresh thyme
1 sprig fresh rosemary
1 clove of garlic, peeled
2 teaspoons black peppercorn

Add all ingredients to a large stock pot. Bring to a boil then reduce to low and simmer for about 2 1/2 to 3 hours, skimming fat, occasionally. Strain the stock and use in your favorite recipes, like this one, or freeze for later use.

Sunday, November 21, 2010

Thanksgiving Menu

Planning your Thanksgiving Day menu? Need some ideas? 

Here's what will be on my table this Thanksgiving:

 Turkey Gravy
Rolls

I hope you have a wonderful Thanksgiving!

Baked Brie en Croute (with cranberries and pecans)

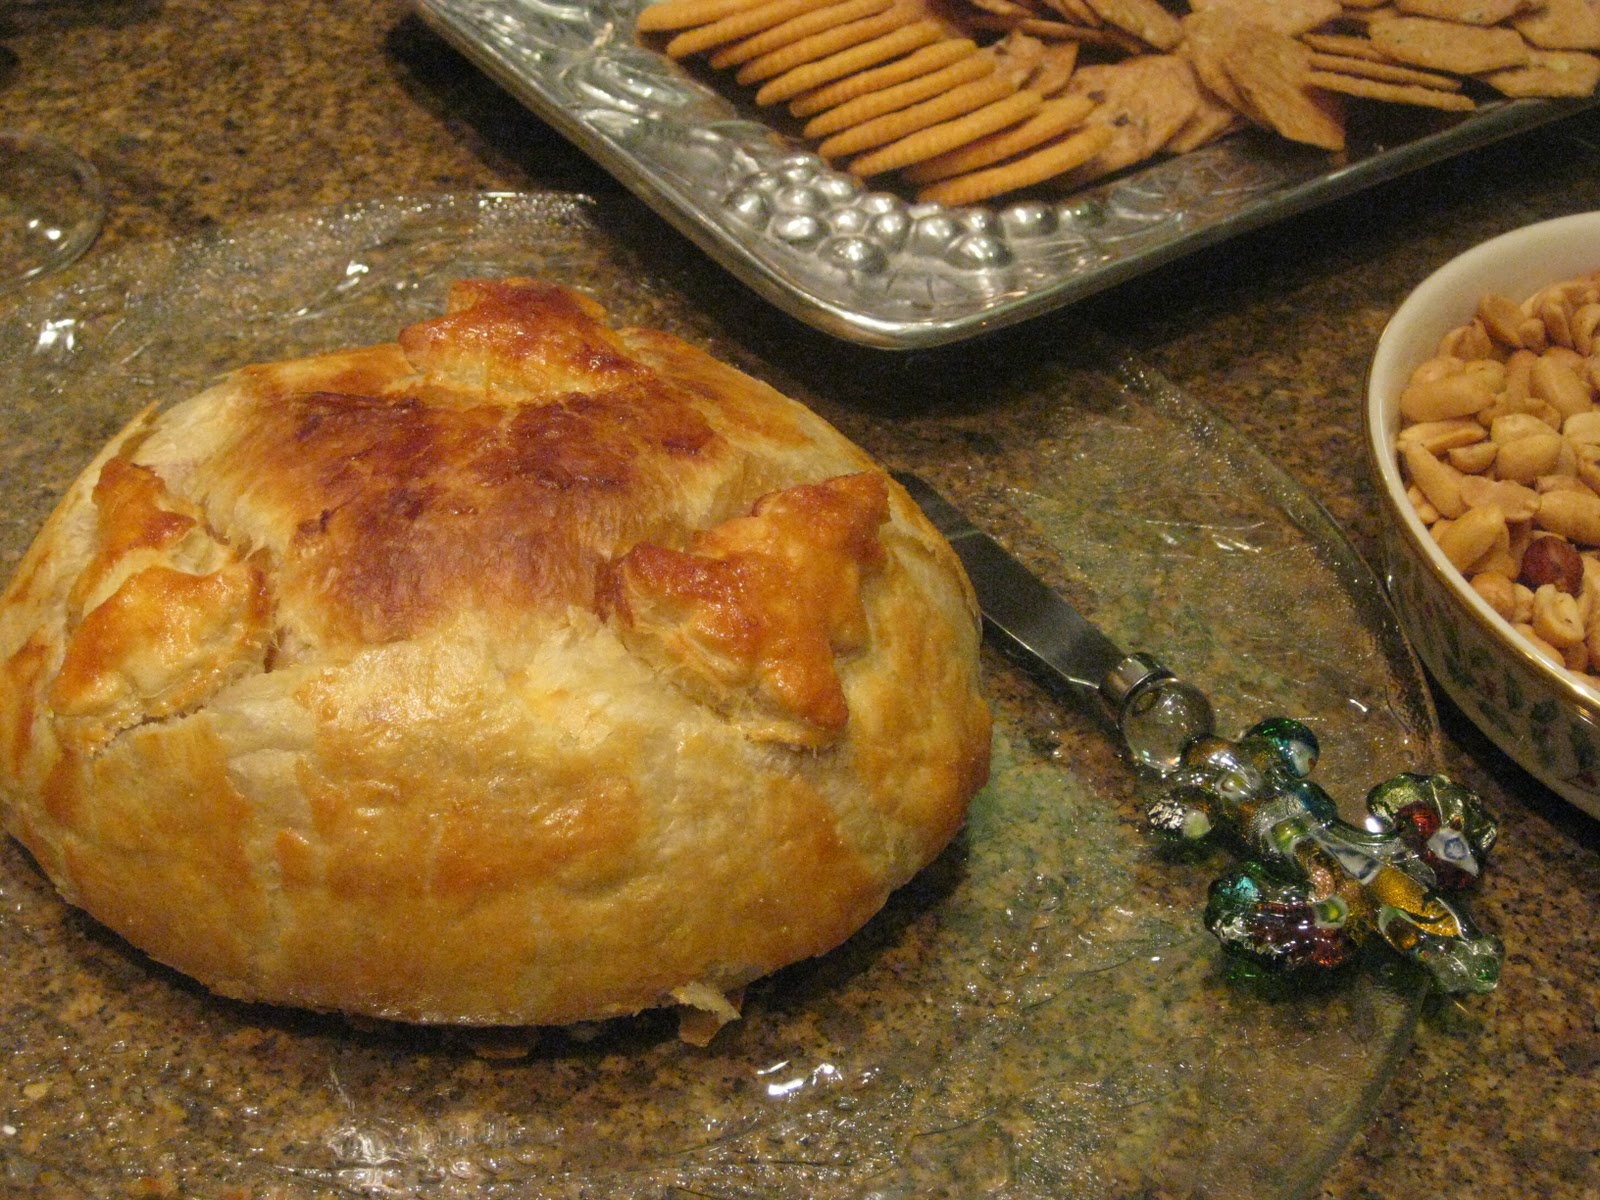
In need of an easy yet elegant appetizer? Look no further! This recipe can be prepared in less than ten minutes and will look great when it comes out of the oven--and will taste even better! I recently made this for a dinner party and it seemed to be a big hit because it was gone fairly quickly!


The creamy brie goes really nicely with the tang of the cranberries and the crunch of the pecans while the buttery, flaky pastry holds it all together and imparts a decadence in both taste and appearance.

Ingredients:
1 wheel of brie cheese
1/4 cup pecan halves, chopped
3 tablespoons cranberry preserves
2 tablespoons dried cranberries (Craisins), roughly chopped
1 tablespoons flour
1 sheet puff pastry, thawed
1 egg, beaten

Preheat oven to 375 degrees. Remove brie from packaging and carefully cut the rind off using a serrated knife. Hold your knife parallel to the counter and carefully shave the brie off the top and bottom. Turn the brie up on its side to cut the rind off the sides. Don't worry if you don't get it all off, you just want to lightly remove the rind but not too much that the cheese will lose the shape.

In a small pan over low heat, toast pecans for several minutes, until warm. Toasting nuts releases the oil in the nuts and intensifies the flavor. Remove pecans from pan and roughly chop. Add the pecans, preserves and cranberries to a small bowl and mix until well combined.

Dust your countertop with the flour and carefully unfold the puff pastry. With a rolling pin, roll the puff pastry out to expand the size a bit. Spoon the pecan mixture onto the center of the puff pastry. Place the brie directly on top of the pecan mixture. Carefully fold up the sides of the pastry around the brie, crimping the sides together and tucking the folds under. If you can, trim off any excess pastry. Flip the brie and place on a pan seam side down. If you have any excess pastry, use it to decorate the top. I attempted to make some leaves for mine and they didn't turn out so hot, so I hope you have a bit more talent than I-which shouldn't be hard...I am not much of an artist! In a small bowl, beat the egg and add about a teaspoon of water. Brush the pastry with the egg wash.

Bake for about 20-25 minutes or until the pastry is a nice golden brown color.

Allow to sit for about 10-15 minutes before cutting into the pastry to allow the cheese to set a bit. Serve with an assortment of crackers.

Enjoy!
Related Posts with Thumbnails