Thursday, November 19, 2009

Pumpkin Gooey Butter Cakes

Since I don't bake all that often and don't really experiment with desserts (there is science to baking that you don't really want to mess with...) I turned to an expert to find a a delicious and decadent dessert for Thanksgiving. Who better to go to than the wonderful Paula Deen?! This dessert by Paula Deen is soo delicious and it is sure to become a family favorite just as it has in our family.

Cake:
1 (18 1/4-ounce) package yellow cake mix
1 egg
8 tablespoons butter, melted

Filling:
1 (8-ounce) package cream cheese, softened
1 (15-ounce) can pumpkin
3 eggs
1 teaspoon vanilla
8 tablespoons butter, melted
1 (16-ounce) box powdered sugar
1 teaspoon cinnamon
1 teaspoon nutmeg

Preheat oven to 350 degrees F.

Combine the cake mix, egg, and butter and mix well with an electric mixer. Pat the mixture into the bottom of a lightly greased 13 by 9-inch baking pan.

To make the filling: In a large bowl, beat the cream cheese and pumpkin until smooth. Add the eggs, vanilla, and butter, and beat together. Next, add the powdered sugar, cinnamon, nutmeg, and mix well. Spread pumpkin mixture over cake batter and bake for 40 to 50 minutes. Make sure not to overbake as the center should be a little gooey.

Enjoy!

Monday, November 9, 2009

Brined and Roasted Turkey (Thanksgiving)

Can you believe that it is almost Thanksgiving? This year has just flown by! (It is actually just a few days away from our first wedding anniversary and I can not believe the first year has gone by so quickly! Great memories already! Happy Anniversary Steven!)

Anyways, back to Thanksgiving!

I am such a holiday-loving girl and of course Thanksgiving is no exception! There is so much cooking to be done, time spent with family and of course, eating! What's not to love! For me, my favorite part of the holiday is the Wednesday before Thanksgiving which I aptly nicknamed "Cooking Day." This is the day when my mom and sisters and I get together and start cooking for Thanksgiving. Translation: My mom and I do a lot of cooking, Annie tries to cook and we all laugh at her and Katherine does a dessert or two and sits at the counter and reads gossip magazines out loud. It is truly one of my favorite days.

Because Thanksgiving is largely built around traditions (at least in our family) and there is a lot of pressure to please and impress, it is a time of the year that I don't really mess around with trying a whole lot of new things in the kitchen. I stick with the favorites.

Since the turkey is the star of the show, it has to be good, so my mom and I do the same turkey every year (and actually for the last couple of years, I did it all by myself!).

If you are looking for a new recipe, this is one to try! You will not be disappointed. The turkey comes out juicy and delicious!


Brine:
1 cup salt
1 cup brown sugar
2 oranges, quartered
2 lemons, quartered
6 sprigs thyme
4 sprigs rosemary
Dissolve the salt and sugar in 2 gallons of cold water in a non-reactive container (such as a clean bucket or large stockpot, or a clean, heavy-duty, plastic garbage bag.) Squeeze the oranges and lemons and add them, along with the thyme and rosemary, to the brine.

Turkey:
1 (10 to 12-pound) turkey
Brine, recipe follows
4 tablespoons unsalted butter at room temperature
1 large yellow onion, cut into 8ths
1 large orange, cut into 8ths
1 stalk celery, cut into 1-inch pieces
1 large carrot, cut into 1-inch pieces
2 bay leaves
2 sprigs thyme
1 1/2 to 2 cups chicken or turkey stock, for basting

Remove the neck, giblets, and liver from the cavity of the turkey. Rinse the turkey inside and out under cold running water.

Soak the turkey in the brine, covered and refrigerated (or in a cooler), for at least 4 hours and up to 24 hours. Turn the turkey at least once during the process.

Preheat the oven to 325 degrees F.

Remove the turkey from the brine and rinse well under cold running water. Pat dry with paper towels, inside and out. Place breast side down in a large, heavy roasting pan and rub on all sides with the butter. Season lightly inside and out with salt and pepper. Stuff the turkey with the onion, orange, celery, carrot, bay leaves and thyme. Truss the turkey with kitchen twine.

Roast the turkey, uncovered, breast side down for 1 hour. Remove from the oven, turn, and baste with 1/2 cup stock. Continue roasting with the breast side up until an instant-read meat thermometer registers 165 degrees F when inserted into the largest section of thigh (avoiding the bone), about 2 3/4 to 3 hours total cooking time. Baste the turkey once every hour with 1/2 to 3/4 cup chicken or turkey stock.

Remove from the oven and place on a platter. Tent with aluminum foil and let rest for 20 minutes before carving.

I will post some more Thanksgiving favorites as it gets closer. If you have a family tradition or recipe that you would like to share, let me know! I'd love to post it for you!

Friday, October 30, 2009

Football Food Friday! Baked Taquitos with Chicken, Carmelized Onions, Lime and Cilantro

You will love this homemade version of the frozen food classic! These taquitos are easy, healthier and more flavorful than the kind you buy in the grocery store. I can promise you will love them! (The actually came from an idea that my husband gave me, so he technically deserves the credit!)

Ingredients
2 boneless, skinless chicken breasts, cubed
2 tablespoons olive oil
1 medium yellow onion, sliced very thinly.
Salt, pepper and garlic power, to lightly season
1 cup very loosely packed cilantro leaves
2 medium limes- zest of one, juice of both
1/2 teaspoon cumin
1/4 teaspoon chili powder
5 medium sized tortillas

Cilantro Lime Sour Cream
About 2-3 tablespoons of sour cream (light or non fat is fine)
1 tablespoon finely chopped fresh cilantro
zest and juice of 1/2 of small lime

Preheat oven to 400 degrees. Preheat two skillets with one tablespoon each of olive oil over medium heat. Add onions to one pan and allow to carmelize. Caramelizing takes awhile (about 20 minutes), so be patient and allow the onions to cook down to a deep golden-brown color, stirring occasionally.

Meanwhile, season cubed chicken with salt, pepper and garlic. Add chicken to the other pan and saute until cooked through, five to seven minutes.

When the chicken is cooked and the onions are carmelized, remove both from their pans to a cutting board. Finely mince the cilantro, and chop the onions and chicken as small as you can. Add the chicken, cilantro and onions back to one pan and heat on low. Add the lime zest and juice, cumin and chili powder, stirring to incorporate.

Cut the tortillas in half. Starting with one tortilla half, fill place a "tong-ful" (meaning the amount you grasp with tongs) :) of filling about 1/3 of the way up the tortilla. Roll the tortilla around the filling and secure with a toothpick. Place on a baking sheet. Repeat with remaining tortillas or until you run out of filling.

Bake for seven minutes. Broil on high for two minutes.

Prepare the sauce in a small bowl by combining the sour cream, zest, juice and cilantro. Sprinkle a tiny bit of the cajun seasoning. Taste a bit of the sauce to see if it needs to be adjusted. It should taste light and fresh with a touch of lime. If it is too much cilantro, add some lime and vice versa if it is too limey.

Remove from the oven and serve with cilantro lime sour cream or your choice of salsa.

Enjoy! Happy Gameday!

Wednesday, October 28, 2009

Chicken Piccata

Ingredients
2 skinless and boneless chicken breasts, butterflied and then cut in half
Salt and freshly ground black pepper, to season chicken
All-purpose flour, for dredging
2 tablespoons butter or margarine
2 tablespoons extra-virgin olive oil
1/3 cup fresh lemon juice
1/2 cup chicken stock
2 tablespoons capers

To butterfly chicken, hold the knife parallel to the counter and carefully slice through the middle of the chicken pulling the top back as you slice until it lays flat. Cut the two pieces apart.
Lay a large piece of plastic wrap on the counter or your cutting board, placing one chicken piece on top. Lay another piece of plastic wrap on top. With a large heavy skillet or meat mallet, pound the chicken until approximately 1/2 inch thick and more uniform in thickness. Repeat with other three pieces.
Season chicken with salt and pepper. Lightly dredge chicken in flour and shake off excess.
In a large skillet over medium high heat, melt 1 tablespoon of butter with 1 tablespoon olive oil. When butter and oil start to sizzle, add 2 pieces of chicken and cook for 3 minutes. When chicken is browned, flip and cook other side for 3 minutes. Remove and transfer to plate and cover with foil. Melt 1 more tablespoon butter and add another tablespoon olive oil. When butter and oil start to sizzle, add the other 2 pieces of chicken and brown both sides in same manner. Remove pan from heat and add chicken to the plate.
Into the pan add the lemon juice and stock. Return to stove and bring to boil, scraping up brown bits from the pan for extra flavor. Reduce heat to a simmer, check for seasoning and allow to simmer for five to seven minutes. Add capers return all the chicken to the pan and simmer for two minutes. Remove chicken to platter. Pour sauce over chicken.
Enjoy!
Let me know what you think!

Friday, October 16, 2009

Football Food Friday! Bacon Wrapped Pretzel Rods


In honor of the greatest football weekend of the year, OU/TX,
I am posting one of my favorite football/party foods! This is such an easy recipe and these things will be gone the second you put them on a plate!

Ingredients:
1 package of thick cut bacon
Pretzel rods: 1 per strip of bacon
1 to 1 1/2 cups of fresh shredded parmesan cheese

Preheat oven to 400 degrees. Line a baking sheet (make sure it has sides) with foil. Take one strip of bacon and starting at one end of the pretzel rod, tightly wrap it around the pretzel finishing at the other end. Place on baking sheet, tucking ends under the pretzel rod to keep it wrapped up. Bake for approximately 20 mintues or until the baked is cooked and beginning to crisp. Remove from oven and cool for a few minutes before transfering to serving platter. Sprinkle pretzels with parmesan cheese and ENJOY!

Leave a comment to let me know what you think!

BOOMER SOONER!


Friday, October 9, 2009

Football Food Friday! Cream Cheese Sausage Dip

This is such an easy and delicious recipe that my sister, Katherine, gave me. I am telling you, it will be a crowd pleaser and you'll want to make this every gameday!


Ingredients
1 package of breakfast sausage (the kind in the tube-like packages) or other favorite sausage
2 8oz. packages of cream cheese, room temperature
2 cans of Rotel

Brown the sausage in a skillet over medium heat. Drain any excess fat and put the sausage into your slowcooker with the temperature turned to high. Add Rotel and cream cheese stirring occasionally until cream cheese is melted and everything is mixed well. Once it is all melted, turn slowcooker to low or warm.

*Tip* Cut the cream cheese into small cubes for faster melting.

Serve with Fritos or tortilla chips.

As always, leave a comment to let me know what you think! Also, use the comments to give a shout out to your favorite team!

Thursday, October 1, 2009

Football Food Friday! Chorizo Stuff Jalepeno Poppers

Football Food!

A delicious accompaniment to any gameday festitivity and if you like it hot, this is a great recipe for you!

This is a slightly ambitious recipe in terms of preparation but it is still very simple to follow.

In addition to the ingredients below, you'll need a peeling knife or paring knife and a jalepeno roaster.

Ingredients:
1/2 lb. of ground chorizo sausage
4 oz. cream cheese (half of a package) at room temperature.
18 jalepeno peppers

Preheat outdoor grill to medium high heat.

In a skillet over medium high heat, brown the chorizo and drain off any excess fat. Transfer the chorizo to a mixing bowl and stir in the cream cheese until well incorporated. Set aside.

To prepare jalepenos, cut the tops off and carefully hollow out the centers of the peppers, removing the seeds and ribs. This is where the pointed tip of the peeling knife comes in handy, but a paring knife should be fine! I would suggest holding the peppers with a dish towel or wearing rubber gloves because if you did not know, jalepenos can actually burn your skin, so be careful and wash your hands when you are finished!

When you have prepped all the peppers, begin stuffing them with the chorizo mixture. You will more than likely have extra chorizo left over, so use it the next day in scrambled eggs or a breakfast burrito!

Gently place the jalepenos, stuffing side up, in the roaster and place on grill over indirect heat for about 10-12 minutes until peppers are cooked through and slightly charred.

**If any of the peppers are small enough to fall through the roaster, use a doubled over piece of foil and poke a hole in it and then place the jalepeno in the hole. This will hold it up and prevent it from falling through.

Remove from roaster and serve alone or with ranch dressing. Enjoy!

Let me know what you think!

Football Food!

It's that time of year when the leaves start turning (barely), it gets a little cooler (really?) and everyone is excited for the big game (or in my husband's case, beside himself). It's FOOTBALL season!

Whatever your team is (SOONERS!!), you know you are always thinking, "What should we make for the game?" Football food, as my family calls it, is always the answer!

So, get excited for some delicious football food recipes for the rest of the football season (Sorry I am off to a late start!)! I am going to post them on Fridays so that you have enough time to go to the store before the big games on Saturday and Sunday!

Wednesday, September 23, 2009

Mediterranean Flatbread Pizza

For those you know might be thinking, Pizza?? Caroline doesn't even like cheese, why is she making pizza?!?

And all of you are correct, I don't like cheese in the general sense, but there are a few exceptions. While I won't get into the idiosyncrasies of my pickiness, (because let's face it, it might take awhile!) there are a few cheeses that I like, goat cheese being one of them and that's what my flatbread recipe calls for!

This recipe is super duper fast and easy and is pretty healthly and the great thing about it is you can add your favorite ingredients for a new flatbread pizza everytime! This is a great recipe to make with your husband/boyfriend, kids or friends and can be served for dinner or would be great to serve at a party!

Ingredients:
1 store-bought pizza dough
Olive oil
Garlic power, for sprinkling
About 1/2 cup store bought spagetti sauce of your choice
1 small onion
1 small can of black olives, drained
1/4 cup marinated artichoke hearts, roughly chopped
About 1/2 cup of goat cheese crumbles
Turkey pepperoni (it's 1/3 less fat than regular and tastes the same!)

Preheat oven to 400 degrees.

Heat about 1 tablespoon of olive oil in a skillet over medium high heat. Slice the onion very thinly and add to the pan to caramelize. Sprinkle lightly with salt and pepper. Caramelizing takes awhile (about 20-25 minutes), so be patient and allow the onions to cook down to a deep golden-brown color, stirring occasionally.

Lightly spray a flat baking sheet and roll out the crust onto the sheet. Roll out with a rolling pin as thin as you can get it. Lightly drizzle with olive oil and sprinkle with garlic powder. Using a fork, pierce the dough all over to prevent the dough from bubbling up and rising too much when you bake it. Bake the crust for about 8-10 or until it is just starting to turn golden. It will not necessarily be cooked all the way or totally golden brown but pre-cooking the crust will ensure that the end result is extra crispy! Allow the crust to cool for a few minutes before putting the toppings on.

Begin with the sauce, spreading thin and leaving a very small border around the edges. Add onions, artichoke hearts, olives, goat cheese distributing evenly over the crust. Place pepperoni over the toppings. Bake for an additional 8-10 minutes or until crust turns golden brown.

Enjoy!

As always, leave a comment if you have a question or just to let me know what you think!

Wednesday, September 16, 2009

Honey Glazed Sesame Chicken

Sorry for the long break without any new recipes! I hope you missed me! ;)

This is a VERY simple recipe that is delicious and healthy! I was going for something similar to PF Chang's or Pei Wei without frying the chicken, so I hope you like this lighter but just as tasty version!

Serves 2 (but you can easily double!)

Ingredients:
1/2 cup soy sauce (low sodium)
2 tablespoons honey
1 teaspoon fresh grated ginger
2 cloves garlic, minced
1/4 teaspoon red pepper flakes
2 chicken breasts, cut into one inch pieces
1/4 cup sesame seeds

Whisk first five ingredients together in a small bowl. Put chicken pieces a shallow dish or bow and pour half of the mixture over the chicken. Reserve the rest of the mixture for later. Cover the chicken and marinate in the refrigerator for 30 minutes to two hours. Heat a nonstick skillet over medium high heat and cook chicken pieces until cooked through. Remove chicken from pan.

Meanwhile, toast sesame seeds in a small skillet over light heat or on a sheet pan in the oven. This will bring out the flavor of the sesame seeds.

Add remaining soy sauce mixture to pan and bring to a light simmer. This will allow the sauce to thicken. Once the sauce has thickened a bit, add chicken back to pan, tossing to coat. Sprinkle sesame seeds over chicken and serve over brown rice and/or with steamed vegetables.

As always, leave me a comment if you have any questions or just to let me know what you think!

Monday, August 31, 2009

Pad Thai

Love pad thai? Well, now you can make it at home with ingredients you probably already have and stop spending money on take-out!


1 package of flat rice noodles (Chinese section of the grocery store)
1 lb. choice of beef, chicken, pork, shrimp
2 tablespoons olive oil
2 garlic cloves
2 teaspoons freshly grated ginger (in the produce section)
1/2 cup chicken broth
2 tablespoons low sodium soy sauce
2 tablespoons ketchup
1/2 teaspoon fish sauce
1 tablespoon sugar
1/2 teaspoon hot sauce
1 head of brocoli, cut into florets and lightly steamed*
2 green onions, cut into one inch lengths
1 can of water chestnuts, drained and roughly chopped
1/4 cup chopped fresh cilantro

Bring pot of salted water to a boil. In a wok or large saute pan, heat olive oil on medium high heat. Add ginger and garlic and cook for one minute. Add meat of your choice and saute until cooked through and remove from pan. Drain fat from pan, if necessary. Deglaze pan with chicken stock, scraping browned bits from the bottom, bring to a simmer.

Meanwhile, cook noodles according to package directions and drain.

In a small bowl, whisk together soy sauce, ketchup, fish sauce, sugar and hot sauce and add to the pan. Simmer for about 5-7 minutes to allow the sauce to thicken and the flavors to incorporate.

Add steamed brocoli, green onions, water chestnuts to the pan and toss in sauce. Add meat and noodles to the pan tossing well. Before serving, stir in the fresh cilantro.

*If you don't have a steamer, a very easy and quick way to steam vegetables is to put them in a microwave safe bowl and tightly cover the bowl with plastic wrap. Microwave in 30 second intervals until desire doneness--about one minute and a half for very crisp, al dente, which is the way I like it.

I hope you enjoy this homemade version of pad thai! As always, leave a comment with questions or to let me know what you think!

Friday, August 28, 2009

Creamy Mushroom and Leek Pasta

This is a simple and delicious dinner that is one of my husband's favorites and I hope it becomes one of yours!

If you are not familiar with leeks, they basically look like a green onion on steroids and have a mild onion flavor. You can find them in the produce section of the grocery store.

Ingredients:
2 tablespoons olive oil
2 cloves of garlic
8 oz. carton of baby bella mushrooms
4 oz. of shitake mushrooms or other favorite variety of mushroom (can add more or less, if you want)
1/4 teaspoon dried rosemary
1 to 2 leeks, depending on size (only one if they are especially large)
1/2 can vegetable stock or broth
1 cup milk
2 tablespoons flour
1/2 cup parmesan cheese
Salt, to season
Pepper, to season
1 box penne pasta

To prepare, lightly wipe mushrooms with a damp towel to remove dirt, if needed and then roughly chop. If using shitake mushrooms, remove the stem before chopping as you will not want to use that part. To prep the leeks, cut the root end off then slice the leek lengthwise down the middle. Using one half at a time, flat side down and starting with the white end, thinly slice the leek up to the light green part. Discard the dark green part. Continue until all leeks are sliced. Fill a large bowl with water and put the leeks in the water to wash, swirling the leeks with your hand, a spoon or tongs to free the leeks of dirt (there will be dirt and grit in the bottom of the bowl, so do not skip this step!!) Spread the clean leeks on a clean dish towel or paper towl and allow to dry, patting if needed.

Meanwhile, bring water to a boil and cook pasta according to package directions.

In large high-sided saute pan (like this P.S. this pan is super versatile, I use mine all the time), heat olive oil over medium heat. Saute garlic for one minute. Add the mushrooms and allow to cook down until browned, about 5-7 minutes. While the mushrooms are cooking, add the rosemary and season with pepper only. (Do not salt at this point at it will cause the mushrooms to release moisture.) Remove the mushrooms from the pan. Add leeks, season with salt and pepper, and allow to cook for about 3 minutes, or until almost translucent in color. Add the mushrooms back to the pan. Add the stock and simmer for 3-4 minutes. Add salt and pepper, if needed.

Whisk flour into milk and add to the pan, stirring to incorporate. Bring back to simmer and allow the sauce to reduce and thicken. The sauce should be thick and creamy! Check the seasoning and add salt and pepper, if needed.

Drain the penne and add to the saute pan, folding it in to incorporate it with the sauce. Turn off the stove and top with the parmesan cheese, stirring once more and Voila!

Enjoy!

As always, leave a comment if you have a question or to let me know what you think!

Wednesday, August 19, 2009

Shrimp and Feta Orzo Salad with Lemon Basil Vinaigrette

This is a deliciously light and tangy recipe that is perfect for summer! You can serve this as a main dish or side dish and is great (or maybe better) the next day.

If you are not familiar with orzo, it is a small (size of rice) teardrop shaped pasta. You should be able to find it in the pasta section of the grocery store.

Ingredients
1 package of orzo pasta
1/2 small green or red bell pepper, chopped
2 green onions, chopped
1/2 cup of crumbled feta cheese
1 lb of shrimp, shelled and deveined and patted dry
1 tablespoon olive oil, plus more for drizzling
cajun seasoning

Vinaigrette:
2 tablespoons dijon mustard
Juice of two lemons and zest of one
2 tablespoons chopped fresh basil
1 garlic clove
1 teaspoon vinegar
3 tablespoons olive oil
Freshly ground black pepper
Salt, if needed

Cook orzo according to package directions. Drain well and put in large bowl. Drizzle lightly with olive oil and toss to prevent sticking.

While pasta is cooking, heat olive oil in skillet. Sprinkle shrimp with cajun seasoning and add to pan. Cook until opaque and pink in color.

Add bell pepper, onions and shrimp to orzo, mix well.

To make dressing, zest (with my favorite tool) one lemon into a small bowl and then add the juice of two lemons. Add mustard, basil, garlic and vinegar to the lemon juice and zest and mix. Very slowly drizzle the olive oil into the mixture while quickly whisking simultaneoulsy to emulsify the vinaigrette. If done properly, the dressing will not separate. )You can also do this very easily in a blender or food processor by drizzling the olive oil through the top opening while the machine is mixing.) Adjust flavor with salt and pepper, if needed.

Add dressing to orzo, tossing well to coat. Gently fold feta into the orzo to incorporate.

Cover and refrigerate until ready to serve.

As always, leave a comment if you have questions or just to let me know what you think!

Enjoy!

Saturday, August 8, 2009

Shrimp and Roasted Green Chile Grits

Before moving to Louisiana, I had never had Shrimp and Grits and frankly did not have any real desire to try it; however, once I tried it, I really liked it and have made it several times in different ways. If you have never tried shrimp and grits, I highly recommend you try this recipe!

This recipe is a little southwestern twist on this southern classic and I think you will really enjoy it!

Ingredients
1 fresh green chile
Olive oil, for drizzling
Salt
Pepper
3 strips of bacon
2 cups of fat free milk
1/2 teaspoon of salt
1/2 teaspoon of garlic powder
1/4 teaspoon of cajun seasoning
1/2 cup of yellow corn grits
1/2 cup shredded cheddar cheese
3/4 pound of shrimp
1 tablespoon of margarine
1/2 teaspoon lemon juice

Arrange oven rack 4-5 inches away from broiler and heat broiler to high. Place green chile on a sheet pan and drizzle chile with olive oil and sprinkle lightly with salt and pepper. Allow chile to roast under broiler until skin is charred and black on all sides (you'll have to turn the chile over mid-way through). Remove from oven and place in a brown paper bag and roll the top of the bag down. Leave chile in the bag for about 15 minutes to allow the chile to steam. This will allow you to easily peal the skin from the chile later.

Meanwhile, heat skillet to medium heat and cook the bacon. I recommend cutting the bacon in half as I find that it cooks better this way. After bacon is crispy remove from pan and allow to cool on a paper towel. Once cool, crumble the bacon. Turn off burner, but reserve bacon grease and drippings in the pan until it is time to cook the shrimp.

Add milk, salt, garlic and cajun seasoning to a medium size saucepan and bring to a boil. Stir milk occasionally so the milk does not scald (burn) on the bottom of the pan before you add the grits. While milk is coming to a boil, remove chile from brown bag. Gently peel the skin away from the chile, using a knife to scape, if necessary. Cut the stem off and slice lengthwise down the chile. Unfold the chile so it is flat and using your knife, scrap all the seeds out and discard. Roughly chop the chili. Make sure to wash your hands when you are finished handling the chile.

When milk comes to a boil, add grits slowly while whisking quickly. Turn temperature to medium low and allow grits to cook according to the package directions. Depending on the type of grits and the brand you purchase, this could be anywhere from six to twenty minutes. Continue to whisk the grits while they are cooking to achieve a creamy texture. Turn temperature to low and add cheese, chopped chile and two-third of bacon crumbles. Stir to incorporate.

Re-heat bacon pan to medium heat. (If there is too much bacon grease, lightly soak it up with a paper towel.) Melt one tablespoon of butter in pan and add lemon juice. Add shrimp to the pan and cook for several minutes until the shrimp are opaque and pink in color.

To serve, spoon grits into a bowl and place shrimp on top. Top with remaining bacon crumbles and ENJOY!


Wednesday, August 5, 2009

Grilled Portabella Paninis with Goat Cheese and Carmelized Onions

Ingredients:
4 portabella mushroom caps
8 slices of gourmet bread of your choice (foccacia, sour dough, ciabatta, whole wheat, etc.)
1 tablespoon olive oil, plus more for drizzling
Balsamic vinegar, for drizzling
1 small to medium sized onion
1 small goat cheese log or 1 tub of herbed goat cheese spread, whichever you prefer
Salt
Pepper

Method:
Prepare by heating grill and panini grill to medium heat. Remove goat cheese from refrigerator to allow it to come to room temperature.

While grill is heating up, heat one tablespoon olive oil in skillet on the stove. Thinly slice onions and add to the pan to caramelize. Sprinkle lightly with salt and pepper. Caramelizing takes awhile (about 20-25 minutes), so be patient and allow the onions to cook down to a deep golden-brown color, stirring occasionally.

Clean the mushroom caps with a slightly damp paper towel and trim the stem off. With a knife, score the top of the cap and the stem in a diamond pattern. Lightly drizzle both sides of the mushrooms with olive oil and balsamic vinegar and sprinkle with salt and pepper. Place mushrooms gill side down on grill and grill for five minutes. Flip mushrooms and grill for an additional five minutes on cap side.

While the mushrooms are grilling, check on the onions. Once they have started to brown, pour a small splash (about one tablespoon) of balsamic vinegar into the pan to deglaze the bottom, scraping up the brown bits and continuously stirring the onions. Then season lightly with salt and pepper.

To assemble sandwich, spread about one tablespoon of goat cheese or herbed goat cheese spread on one side of bread. You may use whichever type of goat cheese you like better. I have done both. It just depends on whichever you think you will use for other purposes. Slice portabella thinly and arrange on another slice of bread, pile high with the carmelized onions and top with other side of bread.

Place sandwich in panini grill and press for several minutes until golden brown.

I hope you enjoy this panini! As always, leave a comment if you have a question!

Friday, July 31, 2009

Stay Tuned...

For a new cute blog design, courtesy of Katie Johnson of The Polka Dot Pig! Check out her website, she is awesome!
http://thepolkadotpig.blogspot.com//

AND

For new recipes coming soon once my blog gets beautified! :)

Have a nice weekend!

Caroline

Thursday, July 16, 2009

Tilapia Sandwiches with Cilantro-Lime Sour Cream Sauce

Well, I was planning to wait until I got my new cute blog design up, but since I am being so slow about it and my sister gave me a shout out on her blog, I guess I better get started!

So, this is a super easy recipe and definitely a favorite of ours and since I made it last night and Annie mentioned it on her blog, I thought it was a good one to start with!

Keep in mind, I am not a big "recipe user" therefore I am probably not the best recipe writer so if you have questions or need me to elaborate on any of the ingredients or steps, let me know!

Ingredients:
-1 tablespoon of olive oil
-1 tilapia filet per person (unless they are really small, buy 3 and split for two people, etc.)
-Tony Chachere's Cajun Seasoning for sprinkling
-Hambuerger buns, 1 per person (I always buy the Cobblestone Mill brand--they are delicious!!)

Sauce:
-About 2-3 tablespoons of sour cream (light or non fat is fine)
-2 teaspoons finely chopped fresh cilantro
-zest of 1/2 of small lime
-1/2 teaspoon of lime juice

Serves 2--Remember that's how many I cook for, but you can certainly double, triple, half, etc. if that's how many you're cooking for!

Heat oil in a nonstick skillet on medium high heat. Sprinkle tilapia filets on both sides with cajun seasoning. Put tilapia in the pan and cook on each side for 3-4 minutes. The fish should firm up a bit and turn white. To test the doneness of meat and fish it is always a good tip to test it with your finger (careful not to burn yourself!). If the fish/meat gives a lot then it is probably not done, if it has some firmness but you can push it a little then it is probably close to perfect! Too firm is not good! :)

While the fish is cooking. Prepare the sauce in a small bowl by combining the sour cream, zest, juice and cilantro. Sprinkle a tiny bit of the cajun seasoning. Taste a bit of the sauce to see if it needs to be adjusted. It should taste light and fresh with a touch of lime. If it is too much cilantro, add some lime and vice versa if it is too limey.

Toast buns in the broiler until lightly golden brown. Make sure to watch them though because things burn fast in the broiler! To plate, spread about one heaping tablespoon of sauce on each bun and place tilapia filet on top!

This dinner is great with any side dish, but I usually do baked sweet potato fries (the frozen kind) because my husband loves them. I have done homemade ones before, but that's a story for another day!

I hope you enjoy this delicious and easy dinner! If you have any questions just leave me a comment and I will be happy to help!

Friday, June 26, 2009

And here we go...

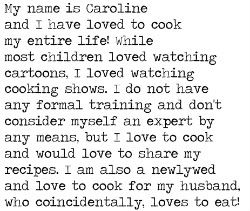
So... my sister and her friends are big into blogging and they all have adorable blogs detailing their families' happenings. My sister is always telling me that I should start a recipe blog, since I love to cook, or a blog about our adventures overseas, I mean Louisiana. (sorry, seems that way sometimes!)

So, I decided to give it a go!

The plan is for me to share recipes that I have either created and/or found and tweaked a bit. You see, I am actually not a big "recipe cooker." I tend to look at recipes and watch cooking shows to learn techniques and get ideas and then just sort of put things together. However, if I have never made something I will usually try an actual recipe the way it is written to get it down and then decide if I should change things the next go 'round.

And since we live far away from family and friends, I think I'll always use this as a way to update you on what's going on with the Pattersons!

We'll see how it goes...

Caroline
Related Posts with Thumbnails