Sunday, October 14, 2012

Bloody Mary Bar

Louisiana has so much to offer in the way of food. Since living in Louisiana, I have eaten some of the best food I have ever had and tried some new things that I either previously did not like or had never really wanted to try. A Bloody Mary is one of those things. It was never something that really appealed to me and one time I had one (in Las Vegas) I didn't really care for it. But, once I tried one here in New Orleans, I realized that these were the real deal--they really know how to make them here!

For the first time in over ten years, Steve decided not to go to Dallas for the annual OU/TX game. The OU/TX game is a game surrounded by great tradition. Between the weekend festivities, the Texas State Fair, seeing friends, walking around hearing Boomer Sooner and OU Sucks constantly, Texas fair food, Big Tex and, of course, the big game, I felt bad that Steve would be missing it. So, to make it a little fun and festive, we decided to have friends over for Bloodys and Breakfast to celebrate the big morning game.

I decided to put together a Bloody Mary bar so that each person to add what they wanted to their own bloody mary. It is super easy to put together and just need to you make sure you have a few options for everyone and let your guests be creative. I have listed a few suggestions below for you but really the possibilities are endless!

The Essentials
The Mix:  If you have a preference, choose your favorite. If not, I recommend Zing Zang. This was a recommendation by one of Steve's coworkers and it really is the best I have had. It is spicy and perfected seasoned. It really stands alone without needing to be "doctored" up.
The Vodka: Again, choose your favorite. We used Tito's. Tito's is handmade vodka from Austin, TX. It is good and not too expensive.
The Veggies: Cut up carrots and celery stalks that can serve as stirrers for your cocktail
The Glass: I think Bloody Marys look best in a high ball glass
The Garnish: Lime Wedges, pickled okra, green olives

The Extras:
Hot Sauce: Here in our house, Tabasco is the only way to go. Crystal or Louisiana Hot Sauce are also good choices
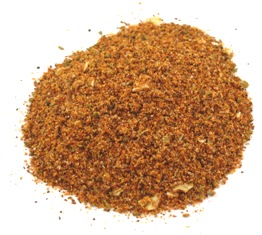
Dry Seasonings: Tony's, fresh ground pepper, celery salt, cayenne pepper. Try rimming your glasses with any of these!
Additional Seasoning Ideas: Worcestershire sauce, horseradish, lemon or lime juice, clam juice, beef broth
Garnishes: Tabasco flavored green beans, pearl onions, boiled shrimp, pepperoncini peppers.


Saturday, September 8, 2012

Creamy Roasted Green Chile Chicken

It's Hatch chile time! Last year, I created this recipe for Green Chile Sauce. When I saw the huge display of Hatch chiles at the grocery store, I wanted to do something similar but kick it up a notch, so I jazzed up last year's recipe a bit by creating a creamy consistency with Greek yogurt and then baked chicken in the sauce and topped it off with pepper jack.


Ingredients:
3 hatch green chiles
2 jalepenos
2 T olive oil, divided
1 T flour
3/4 cup chicken stock
1/8 t ground cumin
1/8 t cayenne pepper
1/8 salt
1/3 cup plain nonfat Greek yogurt
4 boneless skinless chicken breasts
1-2 tablespoons homemade taco seasoning
3/4 cup pepper jack cheese, shredded

First you need to roast the chiles and jalepenos. Green chiles can have a bitter taste in the skin, so roasting the peppers first will get rid of that taste because you'll remove the skin. To roast, you can either hold the peppers over your gas stove, throw on the grill or broil in your oven. You'll want to roast the peppers until the skin blisters and chars. If roasting in the oven, preheat oven to 400 degrees. On a foil lined sheet pan, drizzle peppers with one tablespoon of olive oil and sprinkle with salt. Roast for twenty minutes, flip chiles and jalepenos and roast for an additional 20 minutes. Place the charred chiles in a brown paper bag and allow to sit for 10 to 15 minutes. This will allow them to steam and will make the skin come off easier. Cut off stem, slice lengthwise and gently peel the skin off and remove seeds. Chop into small pieces.

In a pan over medium, heat olive oil. Add onion and garlic to the pan and sauté for two minutes. Add green chiles and jalepenos and sauté another two minutes. Add flour and stir to distribute. Cook out raw flour taste for about one minute. Add chicken stock to the pan, scraping up and browned bits from the bottom. Stir until smooth. Add cumin, cayenne and salt.  Bring to a low boil, stirring occasionally. When it comes to a boil, reduce to a low simmer. Continue to simmer for about 20 minutes.

If you'd like a smoother texture, blend with an immersion blender until you get your desired consistency . If  you don't have an immersion blender, cool sauce and pour in your blender and blend until you get your desired consistency. Make sure to cool the sauce or you might blow the top off your blender and have a giant mess! :)

Remove sauce from heat and stir in the Greek yogurt. Taste and check the seasoning and adjust to your liking.

Preheat oven to 375 degrees. Season chicken on both sides with homemade taco seasoning. Place chicken in your choice of baking dish, sprayed with nonstick spray. Spoon chile sauce all over chicken and top with pepper jack. Bake for about 30-35 minutes (depending on the size of your chicken).


Enjoy!


Homemade Taco Seasoning

Like many processed foods, store bought taco seasoning has a ton of sodium and preservatives. Since many of the spices contained in the store bought varieties are common it is super easy to make your own!

I usually multiply this recipe several times and keep it in an air tight container for use anytime. This is great on chicken, steak, fish, veggies...anything that you want to give a little Mexican flair to.


1 teaspoon salt
1/2 teaspoon black pepper
1 teaspoon garlic powder
1 teaspoon dried minced onion
1 teaspoon cumin
1 teaspoon hot mexican chili powder
1 teaspoon coriander powder
1 teaspoon paprika
1/4 teaspoon cayenne pepper

Enjoy!

Sunday, December 11, 2011

Browned Butter Blondie Brownies

I love love love sweets, but honestly don't bake very often because otherwise I would be the one to eat whatever I bake! So, anytime I have a good excuse to bake, I get excited about the possibilities and want to try to bake something extra special! I was recently invited to a Christmas cookie exchange, so it was the perfect opportunity to try something new!

I have always loved blondie brownies but wanted to do something a little something extra, so I decided to brown the butter. Browning butter results in a really delicious nutty flavor that I thought would work really well with the toffee and chocolate chips. The browned butter really does add a extra special flavor and is definitely worth the extra effort.

2 1/2 sticks unsalted butter
2 1/4 cups all-purpose flour
1 1/2 teaspoons baking powder
1 1/2 teaspoons salt
2 cups packed light-brown sugar
1/2 cup granulated sugar
3 large eggs
2 teaspoons pure vanilla extract
1 cup mini semi-sweet chocolate chips
1 cup toffee bits

Preheat oven to 350 degrees. In a saucepan over medium heat, cook the butter until it turns golden brown—about 15 minutes, but watch carefully and continue to stir with a wooden spoon. Remove from heat and allow to cool. In a large bowl, combine flour, baking powder and salt. In the bowl of an electric mixer, combine browned butter and both sugars. Stir with a wooden spoon until combined. Attach bowl to mixer and add eggs. Using the paddle attachment, beat on medium-high speed until light and fluffy--about three minutes. Add vanilla and beat to combine. Add flour mixture and mix well. Stir in chocoloate chips and toffee. Mix thoroughly and pour into greased 9 by 13 aluminum pan. Spread with spatula to even out. Bake 30-35 minutes (test with with a tootpick--it should come out clean!). Cool pan on a wire rack and cut into squares.

Sunday, November 13, 2011

Crawfish and Sausage Cornbread Dressing

Thanksgiving is coming up and I am getting so excited! I have been planning my menu for weeks. This year, my family will be coming to Louisiana from Texas for Thanksgiving!

Since we'll be having Thanksgiving in Cajun country, I thought I'd add a little Cajun flair to our Thanksgiving menu! While there are some Thanksgiving dishes that you just can't part with and have to make year after year,  the fun thing about stuffing/dressing is that you can really play around with the ingredients and create something totally different each year.

For this year's dressing, I decided to go with crawfish, sausage in a cornbread base. Here is what I came up with! I hope you like it and decide to add it your Thanksgiving menu.


Ingredients:
1 lb. andouille sausage of your choice, casings removed
1 lb. crawfish tails
1/2 cup green bell pepper, chopped
1/2 cup red bell pepper, chopped
1 cup yellow onion, chopped
1 cup celery, chopped
2 cloves of garlic, minced
1 small jalapeno, seeded and minced
3 boxes cornbread mix prepared, cubed and dried out or 1 14oz. bag of cornbread stuffing mix*
1 1/2-2 cups chicken stock
1 teaspoon Cajun seasoning

*If you decide to make your own cornbread, you'll want to do this ahead of time (at least a few hours) to give the cornbread time to dry out.

Make cornbread according to package directions. After cornbread has cooled, make cuts 1 inch apart vertically and horizontally across the pan. Begin to carefully break apart the cornbread. Allow to sit on the counter uncovered to dry out. Toss the cubes/crumbs every few hours to allow it to properly dry out. If you are short on time, pop the pan back in a low oven. Drying the cornbread out first will ensure that you have a light and airy stuffing.

Preheat oven to 350 degrees.

Remove sausage from casings. In a medium size pan over medium high heat, add sausage and cook until done. Add crawfish and cook for 3-5 more minutes. Transfer sausage and crawfish to a large mixing bowl. Add peppers, onion, celery, garlic and jalapeno to the pan. Saute until onions are translucent and peppers are soft. Transfer vegetables to the mixing bowl. Add cornbread crumbles, broth and cajun seasoning stirring to combine. Add additional stock if you want a wetter stuffing. Spoon stuffing into a greased 9 x 13 casserole dish. Bake uncovered for 45 minutes. Serve and enjoy!

Saturday, September 10, 2011

Hatch Green Chile Sauce

By nature, I am a planner. I plan out everything. I plan what I need to do and when, what I want to wear and, of course, what I am going to cook.  I don't like to have to go to the store multiple times so I usually plan out the whole week and make a list of everything I need before going to the store.

However, there are rare spontaneous moments when I either can't think of anything to make or just happen to go to the store on my way home, I'll just walk through the produce, seafood, and meat departments to see what looks good, is on sale, in season, etc. This is how I came up with this recipe.

Hatch green chiles come from Hatch, New Mexico and are in season this time of year--late August, early September. My dad grew up in New Mexico and loves New Mexican cuisine, so when I saw the Hatch chiles in the store, I got them in hopes of coming up with something delicious for us, for him and for you!


This sauce can be used in so many ways. I poured it over grilled chicken, mixed it in with scrambled eggs for Steve and even chilled it and ate it with tortilla chips.  Let me know how you use it!


Ingredients:
3 hatch green chiles
2 jalepenos
2 T olive oil, divided
1 T flour
3/4 cup chicken stock
1/8 t ground cumin
1/8 t cayenne pepper
salt & pepper, to taste

First you need to roast the chiles and jalepenos. Green chiles can have a bitter taste in the skin, so roasting the peppers first will get rid of that taste because you'll remove the skin. To roast, you can either hold the peppers over your gas stove, throw on the grill or broil in your oven. You'll want to roast the peppers until the skin blisters and chars. If roasting in the oven, preheat oven to 400 degrees. On a foil lined sheet pan, drizzle peppers with one tablespoon of olive oil and sprinkle with salt. Roast for twenty minutes, flip chiles and jalepenos and roast for an additional 20 minutes. Place the charred chiles in a brown paper bag and allow to sit for 10 to 15 minutes. This will allow them to steam and will make the skin come off easier. Cut off stem, slice lengthwise and gently peel the skin off and remove seeds. Chop into small pieces.

In a pan over medium, heat olive oil. Add onion and garlic to the pan and sauté for one minute. Add green chiles and jalepenos and sauté another two minutes. Add flour and stir to distribute. Cook out raw flour taste for about one minute. Add chicken stock to the pan, scraping up and browned bits from the bottom. Stir until smooth. Add cumin, chili powder, salt and pepper.  Bring to a low boil, stirring occasionally. When it comes to a boil, reduce to a low simmer. Continue to simmer for about 20 minutes.

If you'd like a smoother texture, blend with an immersion blender until you get your desired consistency . If  you don't have an immersion blender, cool sauce and pour in your blender and blend until you get your desired consistency. Make sure to cool the sauce or you might blow the top off your blender and have a giant mess! :)

I hope you enjoy this sauce! Let me know what you think! If you like it, I'd suggest making a big batch and freeze it for when the chiles are out of season.

Tuesday, February 1, 2011

Spice Rubbed Steak Taquitos

I have had a few people mention that they are big fans of my Chipotle Chicken and Cilantro and Lime Chicken taquito recipes, so I asked my resident taquito connoisseur and asked if he had any preferences for a new taquito recipe. He said, "Steak, please." and the result is what you'll find below! A taquito made with flavorful, juicy steak--seasoned to perfection with my homemade spice rub--a little onion, a little heat and some jack cheese. Oila!

I hope you love my homemade taquito recipes as much as my hungry husband! They are definitely a healthier, more flavorful alternative to the frozen variety and are sure to impress!


Spice Rub:
1 teaspoons salt
1/2 teaspoon black pepper
1 teaspoon garlic powder
1 teaspoon dried minced onion
1 teaspoon cumin
1 teaspoon chili powder
1 teaspoon coriander powder
1 teaspoon paprika
1/4 teaspoon cayenne pepper

Ingredients:
1 lb. flank steak
1 teaspoon olive oil
1 poblano, finely chopped
1 quarter of a yellow onion, finely chopped
1 jalepeno pepper, seeded (if desired) and minced
4 oz. jack cheese, shredded
Tortillas
Small skewers

Remove steak from refrigerator and allow to come to room temperature. Preheat grill to high heat.

Season steak liberally on both sides with spice rub, rubbing the mixture into the meat. Grill on medium high heat for approximately eight minutes on each side or until desired doneness. Set aside to rest and cool.

Meanwhile, preheat oven to 450 degrees. In a skillet over medium heat, saute the poblano, onion and jalepeno in the olive oil for 2-3 minutes, or until onions are translucent. Remove from heat, allow to cool.

When steak has cooled, cut into thin strips. Make sure to cut perpendicular to the direction the grain runs.

To assemble, cut each tortilla in half. Starting with one tortilla half, place two to three strips of steak on in the tortilla, spoon about one tablespoon of onion mixture into the tortilla. Top with a pinch of cheese, roll tortilla up, wrapping as tightly as possible, secure with a toothpick and place on a baking sheet. Repeat with remaining tortillas or until you run out of steak and onion mixture. Top each taquito with a bit of cheese, if you still have extra cheese leftover. Bake for 7-9 minutes and then broil for one minute.

Enjoy!!

Tuesday, January 4, 2011

Feta Stuffed Crispy Pesto Chicken

I don't know about you, but I love pesto! It has a great color and flavor and it smells great when you cook with it. If you love pesto too, then you will love this easy and delicious recipe that is perfect for weeknight dinners!

The chicken will come out juicy and flavorful with just the right amount of crunch. And it looks pretty too!


Ingredients
4 chicken breasts, boneless, skinless
4 tablespoons feta, crumbled
8 tablespoons store bought pesto
1 cup parmesan cheese, grated
1 cup panko bread crumbs (Japanese style bread crumbs)

Preheat oven to 350 degrees. Trim excess fat from chicken, if needed. In order to stuff the chicken, you will need to create a pocket. To do so, hold your knife parallel to the counter and carefully slice through the middle of the chicken pulling the top back as you slice until it lays almost flat but is still in tact. Repeat with all chicken breasts. Using two tablespoons of pesto per chicken breast, spread one tablespoon on the inside of the pocket and one tablespoon on the entire outside of the chicken. Repeat with remaining chicken. Stuff each chicken breast with one tablespoon of feta crumbles. Secure each chicken breast with a toothpick or small skewer.

In a shallow dish, mix together the panko and parmesan. Throughly coat each chicken breast on both sides with the panko/parmesan mixture, pressing the mixture into the chicken. Place chicken breasts in a greased baking dish or sheet tray. Bake for 30 minutes and then broil on high for one to two minutes until golden brown.

Enjoy!

Friday, December 31, 2010

Diet Dr. Pepper Glazed Ham

I don't typically make ham very often, but there is something about New Year's, ham, black-eyed peas and cornbread that just go so well together that totally justifies buying a huge ol' ham!

This year, I wanted to do a fun twist on the regular glazed ham and since my husband is a HUGE Diet Dr. Pepper fan, I thought I would make a diet Dr. Pepper glazed ham for him! Diet Dr. Pepper has a natural brown sugar flavor --or 23 flavors to be exact ;)-- so that I thought it would work really well as a glaze for the ham.

I hope you enjoy it and most of all, I hope you all have a wonderful New Year full of blessings!


Ingredients
6-8 lb. smoked, bone-in ham
1 12 oz. can of diet Dr. Pepper
2 tablespoons dijon mustard
1/2 cup packed light brown sugar
1 teaspoon cajun seasoning
1/8 teaspoon cayenne pepper

Preheat oven to 325 degrees. Remove ham from refrigerator. Next, you want to score the ham diagonally to create a diamond pattern. To do this, lay the ham, cut side down on a cutting board and with a sharp knife, lightly score the ham with diagonal lines one inch apart across the back of the ham. Turn the ham one counter clockwise quarter turn and score the ham with diagonal lines one inch apart. This should create a diamond pattern. Place ham in a shallow cooking dish (cut side facing out), set aside and allow it to come to room temperature. This is help the ham heat more evenly.

To make the glaze, combine remaining ingredients in a sauce pan over medium high heat. Bring to a light boil and reduce heat to low. Allow glaze to continue to simmer, whisking occassionally. Before the glaze thickens, lightly brush the ham with the glaze, cover the ham with foil and put in the oven to cook for about 3/4 of the total time (see below). The total cooking time will be about 15 minutes per pound, so for example, if your ham is six pounds, you will cook it a total of 90 minutes and you will want to cook it for one hour before reglazing.

Meanwhile, continue to simmer the glaze until reduced by 2/3, about 20-25 minutes. Remove from heat and allow to cool.

After one hour of cooking, remove ham from oven and discard foil. Liberally, glaze the ham with the thickened glaze and return to the oven to cook for the remainder of the time, reglazing every ten minutes.

Remove from oven and allow to rest for 20 minutes before serving. Serve with Hawaiian rolls or your favorite sandwich rolls along with your choice of dijon mustard, mayonaise or leftover Dr. Pepper glaze.

Enjoy!!

Cooking times:
6 lb. 90 mintues total (1 hour, 30 minutes)
7 lb. 105 minutes total (1 hour, 45 minutes)
8 lb. 120 minutes total (two hours)

Wednesday, December 29, 2010

New Year's Black-Eyed Peas

It's not New Year's Day without at least a spoonful of Black Eyed Peas, is it? You know they are supposed to bring you good luck, how could you not have at least a spoonful?...Wink!
So, with the new year approaching, whip up a batch for your family... This recipe is so easy and delicious, you're all sure to have a lucky 2011!
Ingredients:
1 cup thick-cut bacon, chopped
1/2 medium yellow onion, chopped
2 cloves garlic, minced
1 medium jalepeno, chopped (with or without seeds, your call)
4 cups water (plus 1 cup later, if needed)
1 12 oz. package of pre-soaked black-eyed peas
1 teaspoon salt
1/2 teaspoon pepper
1/8 teaspoon ground cumin
2-3 dashes of Tabasco

In a stockpot over medium heat, cook the bacon until browned and crisp. Depending on the size of your pot, you might want to do in two batches so as not to overcrowd the pot. Remove bacon to a plate and drain excess grease from the pot, but leave any browned bits in the pot. Add the onions, jalepeno and garlic to the pot and saute for two minutes. Add the water, peas, salt, pepper, cumin and tabasco and bring to a simmer. Simmer uncovered on low for approximately two hours, stirring occasionaly.

After the first hour, check the water level to see if it looks dry. If needed, add about one additional cup of water. Also, check the broth for flavor and adjust seasonings, if needed.

After the second hour, taste the black-eyed peas for tenderness. Remove from heat or continue cooking depending on how you like your black-eyes peas. Personally, I like them with a little broth and not too mushy, but you can certainly cook them longer if you prefer. Serve with corn bread.

I hope everyone has a wonderful new year full of blessings!

Happy New Year!

Enjoy!
Related Posts with Thumbnails